The following lab activities will give a rundown on how to utilize the CREATE, INSERT, UPDATE and DELETE (CRUD) functionalities of your MySQL database via PHP.
This continues on from where we left off from Lab 09.
The first lab activity will be solely focused on how the CRUD operations can be incorporated as part of PHP files and/or scripts.
The second lab activity will zone in on inserting records, but taking into account how to deal with a serious security vulnerability that often makes one of the top 10 application vulnerabilities.
The third lab activity continues where we left off in Lab 08, but incorporating use of a database to store login information.
Throughout these lab activities, you may boot up phpMyAdmin to check and see if the intended database server modifications are applied correctly.
However, we are to assume that we do not have the luxury of using it when developing database(s) and its/their table(s).
Lab Activity 01: Incorporating CRUD Database Operations with PHP Files
Before we get into the meat and potatoes, we will prepare some files that can enable creation of the database and required table(s) via PHP.
In this lab exercise, we will attempt to prepare the same database and table from the last one, namely the exercise_db database.
The first thing that should be dealt with should be based on whether or not the MySQL database server can be reached.
Provided if your database connection is set properly and you are able to access phpMyAdmin, the following file should be able to tell that a connection to the database server is established.
<?php$servername="localhost";$username="root";$password="";// password for you should be empty if XAMPP/MAMP/Herd is used$conn=newmysqli($servername,$username,$password);// Check connection; if error occurs, display error message and force exitif($conn->error){die("Connection failed: ".$conn->connect_error);}?>
The mysqli object is key here to establish a connection to the database server.
It takes in the server name (that being localhost or 127.0.0.1 by default if you are working on your local machine) and your database server credentials - the username (root by default), and your password.
NOTE
For those who installed each component of the LAMP stack individually including the MySQL database, ensure you remember your root user password.
You will need to fill up $password with that same password or it will throw an error stating that you have incorrect credentials.
Those who proceeded with XAMPP or MAMP should proceed with an empty string as the password value.
If your database connection fails here, you should see a message appearing in your web browser along the lines of the following (differences include whether password is used, path to directory):
Warning: mysqli::__construct(): (HY000/1045): Access denied for user 'root'@'localhost' (using password: NO) in /path/to/project/db-connect-test.php on line 5
Connection failed: Access denied for user 'root'@'localhost' (using password: NO)
With this test file, we can use it to create or drop a database from the MySQL server.
For simplicity sake, we will be attaching db-connect-test.php as like a header attachment with a require statement in the next two PHP files.
The first one creates the database whilst the second one drops the database.
<?phprequire"db-connect-test.php";$sql="CREATE DATABASE IF NOT EXISTS `exercise_db`";// create SQL statement to be executed by MySQL// $conn->query($sql) runs the SQL statement inside $sql, returns TRUE if successfulif($conn->query($sql)){echo"Database created successfully.";}else{echo"Error creating database: ".$conn->error;// $conn->error retrieves the latest error message generated from the MySQL server}$conn->close();// closes the database connection
<?phprequire"db-connect-test.php";$sql="DROP DATABASE IF EXISTS `exercise_db`";// create SQL statement to be executed by MySQL// $conn->query($sql) runs the SQL statement inside $sql, returns TRUE if successfulif($conn->query($sql)){echo"Database dropped successfully.";}else{echo"Error dropping database: ".$conn->error;// $conn->error retrieves the latest error message generated from the MySQL server}$conn->close();// closes the database connection
Here, $conn->query($sql) executes the statement in $sql in the established database server connection.
Should the statement fail to run due to syntax errors, database constraints, etc., the result of this will render FALSE.
The converse is not always the case, but all except the SELECT statements should render a TRUE value.
CHECKPOINT: ARE YOU LOST?
If any of the used SQL statements do not make sense to you, head back into Lab 09 to familiarize yourselves with the required database commands before proceeding with the rest of this practical activity.
After creating the database, we can now establish a more complete connection to it.
The following shows a variant of the db-connect-test.php file, but notably with changes to the creation of the mysqli object.
More specifically, the mysqli object should now include the database name as a fourth parameter.
<?php$servername="localhost";$username="root";$password="";// password for you should be empty$dbName="exercise_db";// database name here, fourth value required$conn=newmysqli($servername,$username,$password,$dbName);// Check connection; if error occurs, display error message and force exitif($conn->error){die("Connection failed: ".$conn->connect_error);}?>
In the same fashion as before, db-connect.php will be added as a header attachment to the rest of the PHP files in this practical exercise.
The next two files deal with creating and dropping the Student table.
<?php/* copy PHP code from db-connect.php, or include it as follows: */require"db-connect.php";// db-connect.php is treated like an attachment$sql="CREATE TABLE IF NOT EXISTS `Student` ( `id` INT NOT NULL AUTO_INCREMENT, `first_name` VARCHAR(50) NOT NULL, `last_name` VARCHAR(50) NOT NULL, `age` INT(3) NOT NULL, `email` VARCHAR(255), `active` BOOLEAN NOT NULL DEFAULT TRUE, PRIMARY KEY(`id`));";// Run the SQL statementif($conn->query($sql))echo"Table `Student` created successfully";elseecho"Error creating table: ".$conn->error;$conn->close();
<?php/* copy PHP code from db-connect.php, or include it as follows: */require"db-connect.php";// db-connect.php is treated like an attachment$sql="DROP TABLE IF EXISTS `Student`;";// Run the SQL statementif($conn->query($sql))echo"Table `Student` dropped successfully";elseecho"Error dropping table: ".$conn->error;$conn->close();
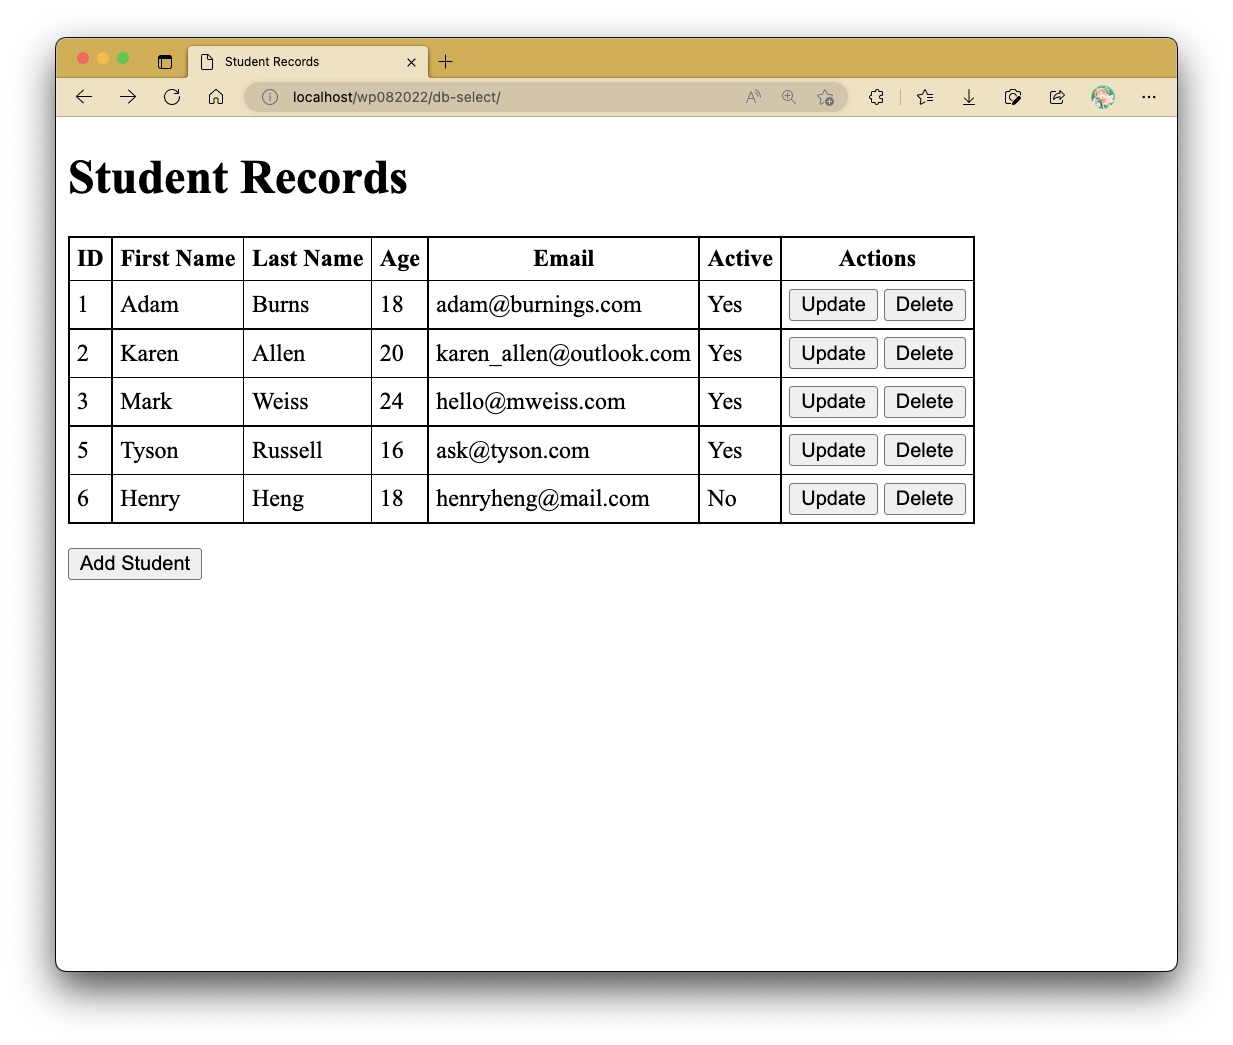
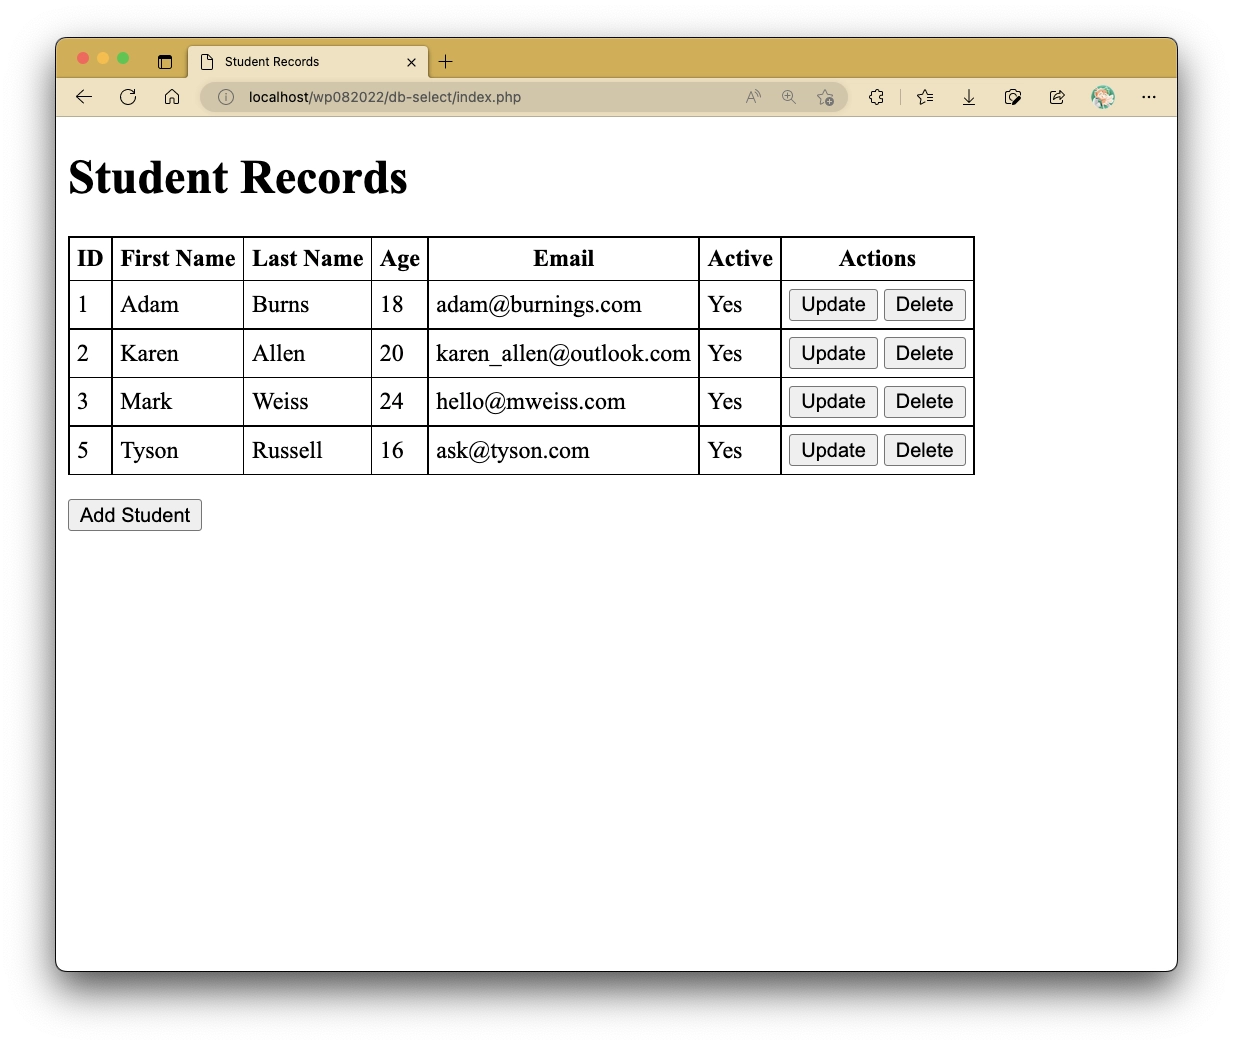
<?phprequire"db-connect.php";?><!DOCTYPE html><html lang="en"> <head> <meta charset="UTF-8"> <meta http-equiv="X-UA-Compatible" content="IE=edge"> <meta name="viewport" content="width=device-width, initial-scale=1.0"> <title>Student Records</title> <style> table { border-collapse: collapse; } th, td { border: 1px solid black; padding: 5px; } </style> <script> function confirmDelete(id) { const CONFIRM_RESULT = confirm(`Do you wish to delete record #${id}?`); if (CONFIRM_RESULT) window.location.href = `delete-student.php?id=${id}`; } </script> </head> <body> <h1>Student Records</h1><?php$sql="SELECT * FROM `Student`";$result=$conn->query($sql);if($result){// check to see if query was successfulif($result->num_rows>0){// $result->num_rows returns the number of row results?> <table> <tr> <th>ID</th> <th>First Name</th> <th>Last Name</th> <th>Age</th> <th>Email</th> <th>Active</th> <th>Actions</th> </tr><?phpwhile($row=$result->fetch_assoc()){?> <tr> <td><?=$row["id"];?></td> <td><?=$row["first_name"];?></td> <td><?=$row["last_name"];?></td> <td><?=$row["age"];?></td> <td><?=$row["email"];?></td> <td><?=$row["active"]==1?"Yes":"No";?></td> <td> <button onclick="window.location.href='update-student.php?id=<?=$row['id'];?>';">Update</button> <button onclick="confirmDelete(<?=$row['id'];?>)">Delete</button> </td> </tr><?php}?> </table><?php}elseecho"No data found.";// $result->num_rows = 0 (no rows of results are retrieved)}elseecho"Error retrieving results: ".$conn->error;// database selection query not successful?> <p><button onclick="window.location.href='../add-student.php'">Add Student</button></p> </body></html>
On line 40, the result after querying the SQL statement into the MySQL server is stored in a variable named $result.
In here, a successful database query does not produce the TRUE value, but rather a query result often stored as an associative array.
An unsuccessful one will still produce FALSE.
Here, $result is checked to see if it is not false before proceeding.
Following this, we check to see if there are any selected rows by retrieving the num_rows attribute from $result.
It is important to know that not all SELECT statements will produce the intended results, let alone the intended number of selected rows.
No row retrieval can mean a wrong SQL statement has been used to be executed in the database server.
Should this happen, do check back in phpMyAdmin to see if there are any discrepancies in the produced SQL statement.
You may need to print out $sql to retrieve the statement used in this case.
In each of the aforementioned checks, appropriate error messages are produced in the browser.
Once all of these checks have been successfully performed and nothing is amiss, we iterate through the array of rows retrieved using a for loop.
In each iteration, we store the current row temporarily in a variable named $row using the fetch_assoc() method.
From here, selecting row data can be performed.
In our index page here, each iteration produces a new <tr> in the <table> element, thus automating something that would have required quite a number of duplicated HTML lines but with different data portrayal.
At the end of each row, an update and delete button is produced to allow editing and/or deletion of the rows starting from the index.php page itself.
We will look into those later.
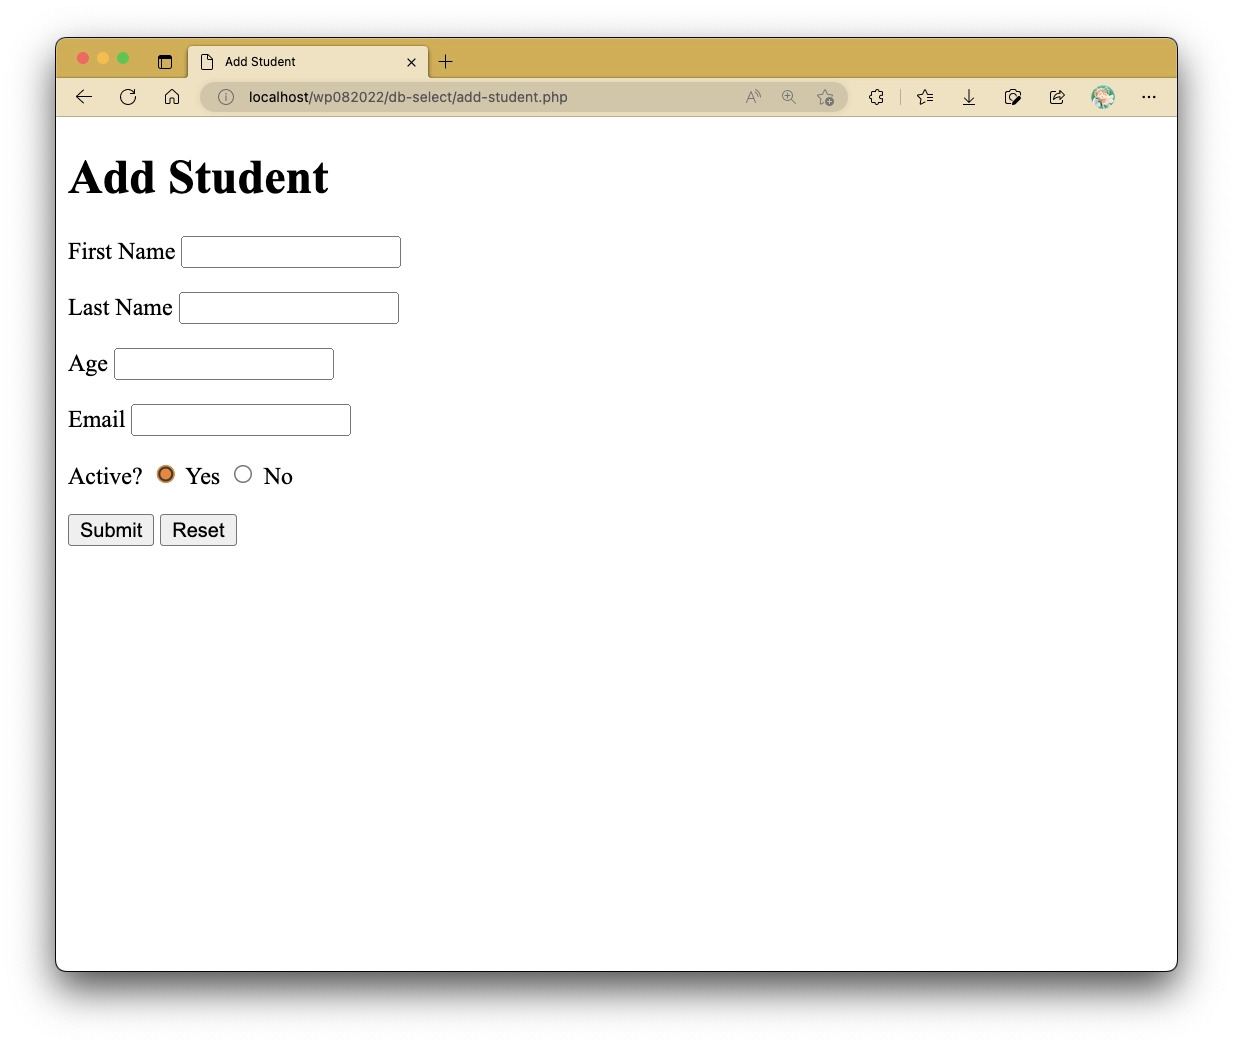
<?phprequire"db-connect.php";// var_dump($_POST);$first_name=$_POST["first_name"];$last_name=$_POST["last_name"];$age=$_POST["age"];$email=$_POST["email"];$active=$_POST["active"];if($age<=0){echo"<script> alert('Invalid age, must be positive!'); window.location.href = 'add-student.php'; </script>";}else{$sql="INSERT INTO `Student` (`first_name`, `last_name`, `age`, `email`, `active`) VALUES ('".$first_name."', '".$last_name."', ".$age.", '".$email."', ".$active.");";// echo $sql;// Run the SQL statementif($conn->query($sql)){echo"Inserted new record successfully";// Redirect to index.php after successful entryheader("Location: index.php");}elseecho"Error inserting record: ".$conn->error;}
The retrieved data from the form (ensure that your name attributes in your form elements are present and aptly named) stored inside the $_POST superglobal variable can then be appended to the $sql statement to be executed in the database server.
An added check for $age is added in order to prevent erroneous age entry into the database.
If the information entry into the database table is successful, the user should be redirected back to index.php where the newly entered data should be reflected in the table.
Note
While it is right to prepare cautionary measures to prevent erroneous or illegal data entry into the database, the database is often not the place to consider implementing such restrictions.
Very often, it falls under the role of other back-end files interacting with it (and in charge of information retrieval).
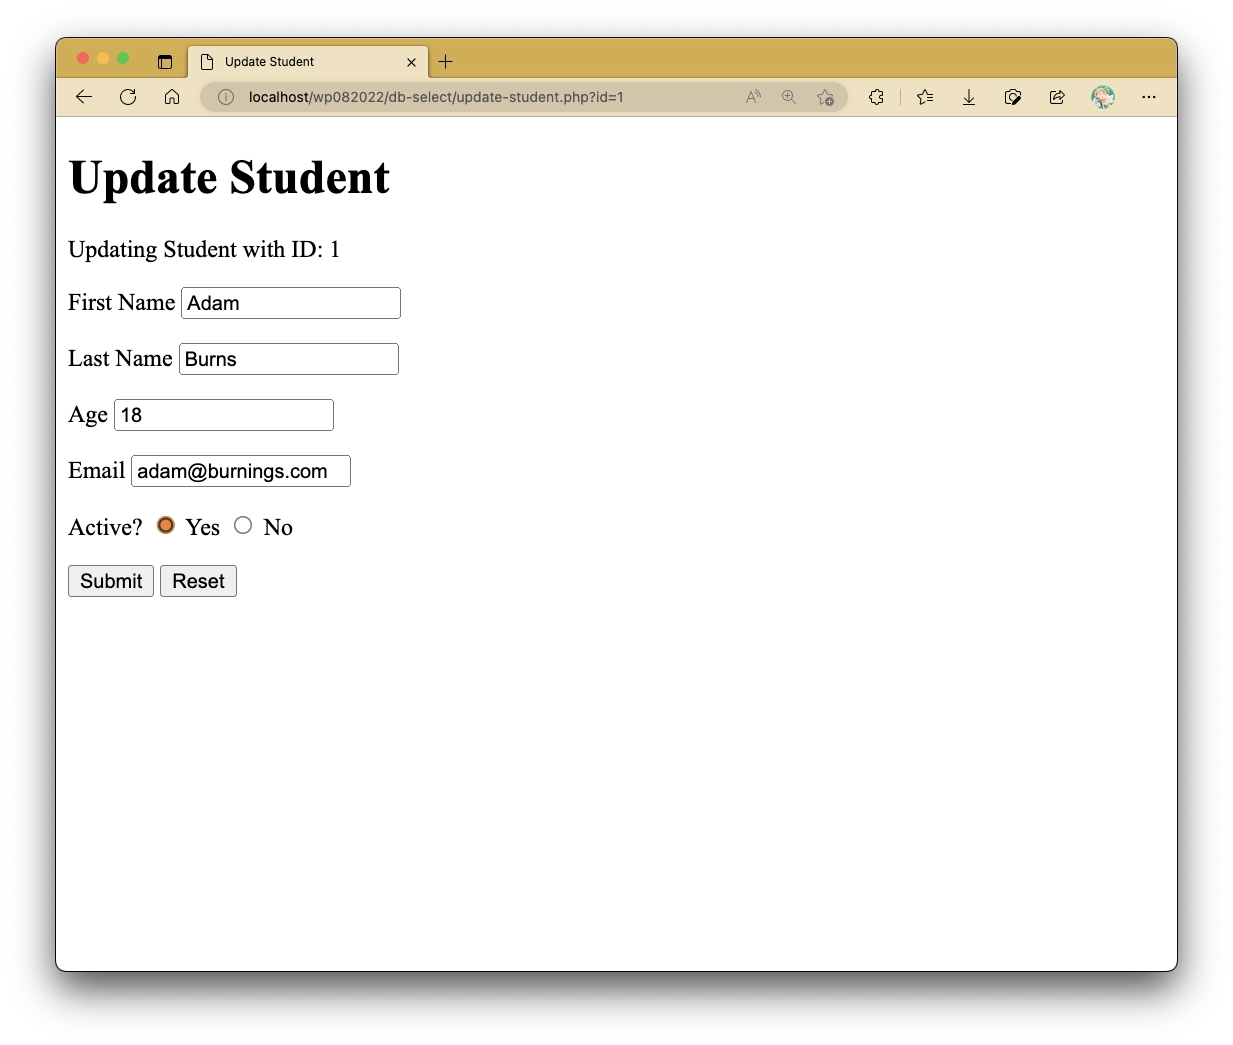
The form associated with updating students is practically the same as the one for adding students in.
However, we populate the input fields accordingly for ease of modification.
This is done by populating the value attributes of each relevant <input> field.
<?phpif(!isset($_GET["id"]))header("Location: index.php");require"db-connect.php";$sql="SELECT * FROM `Student` WHERE `id` = ".$_GET["id"];$result=$conn->query($sql);?><!DOCTYPE html><html lang="en"> <head> <meta charset="UTF-8"> <meta http-equiv="X-UA-Compatible" content="IE=edge"> <meta name="viewport" content="width=device-width, initial-scale=1.0"> <title>Update Student</title> </head> <body> <h1>Update Student</h1><?phpif($result){if($result->num_rows>0){$row=$result->fetch_assoc();?> <form action="update-db.php" method="post"> <input type="hidden" name="id" value="<?=$row["id"];?>"> <p>Updating Student with ID: <?=$row["id"];?></p> <p> First Name <input type="text" name="first_name" id="first_name" value="<?=$row["first_name"];?>" required> </p> <p> Last Name <input type="text" name="last_name" id="last_name" value="<?=$row["last_name"];?>" required> </p> <p> Age <input type="number" name="age" id="age" value="<?=$row["age"];?>" required> </p> <p> Email <input type="email" name="email" id="email" value="<?=$row["email"];?>" required> </p> <p> Active? <input type="radio" name="active" value="1" id="active-yes" <?=($row["active"]==1)?" checked":"";?>> Yes <input type="radio" name="active" value="0" id="active-no" <?=($row["active"]==0)?" checked":"";?>> No </p> <p> <input type="submit" value="Submit"> <input type="reset" value="Reset"> </p> </form><?php}elseecho"No data found.";// $result->num_rows = 0 (no rows of results are retrieved)}elseecho"Error retrieving results: ".$conn->error;// database selection query not successful?> </body></html>
Notice that when you try to click on the Update button present in any one of the rows, you would be redirected to this page here with the form data prefilled.
This involves SELECTing the data from the database table and then appropriately appending them as the value attributes in the corresponding input fields.
This page involves the use of a GET variable (specifically named id), which is checked first before attempting to produce the pre-filled form.
The page redirects you to back to index.php otherwise.
The form handler works the same way as the one used for data entry, but with a different SQL statement.
<?phprequire"db-connect.php";// var_dump($_POST);$id=$_POST["id"];$first_name=$_POST["first_name"];$last_name=$_POST["last_name"];$age=$_POST["age"];$email=$_POST["email"];$active=$_POST["active"];if($age<=0){echo"<script> alert('Invalid age, must be positive!'); window.location.href = 'update-student.php?id=".$id."'; </script>";}else{$sql="UPDATE `Student` SET `first_name` = '".$first_name."', `last_name` = '".$last_name."', `age` = ".$age.", `email` = '".$email."', `active` = ".$active." WHERE `id` = ".$id;// echo $sql;// Run the SQL statementif($conn->query($sql)){echo"Updated record with ID ".$id." successfully";// Redirect to index.php after successful updateheader("Location: index.php");}elseecho"Error updating record ".$id.": ".$conn->error;}
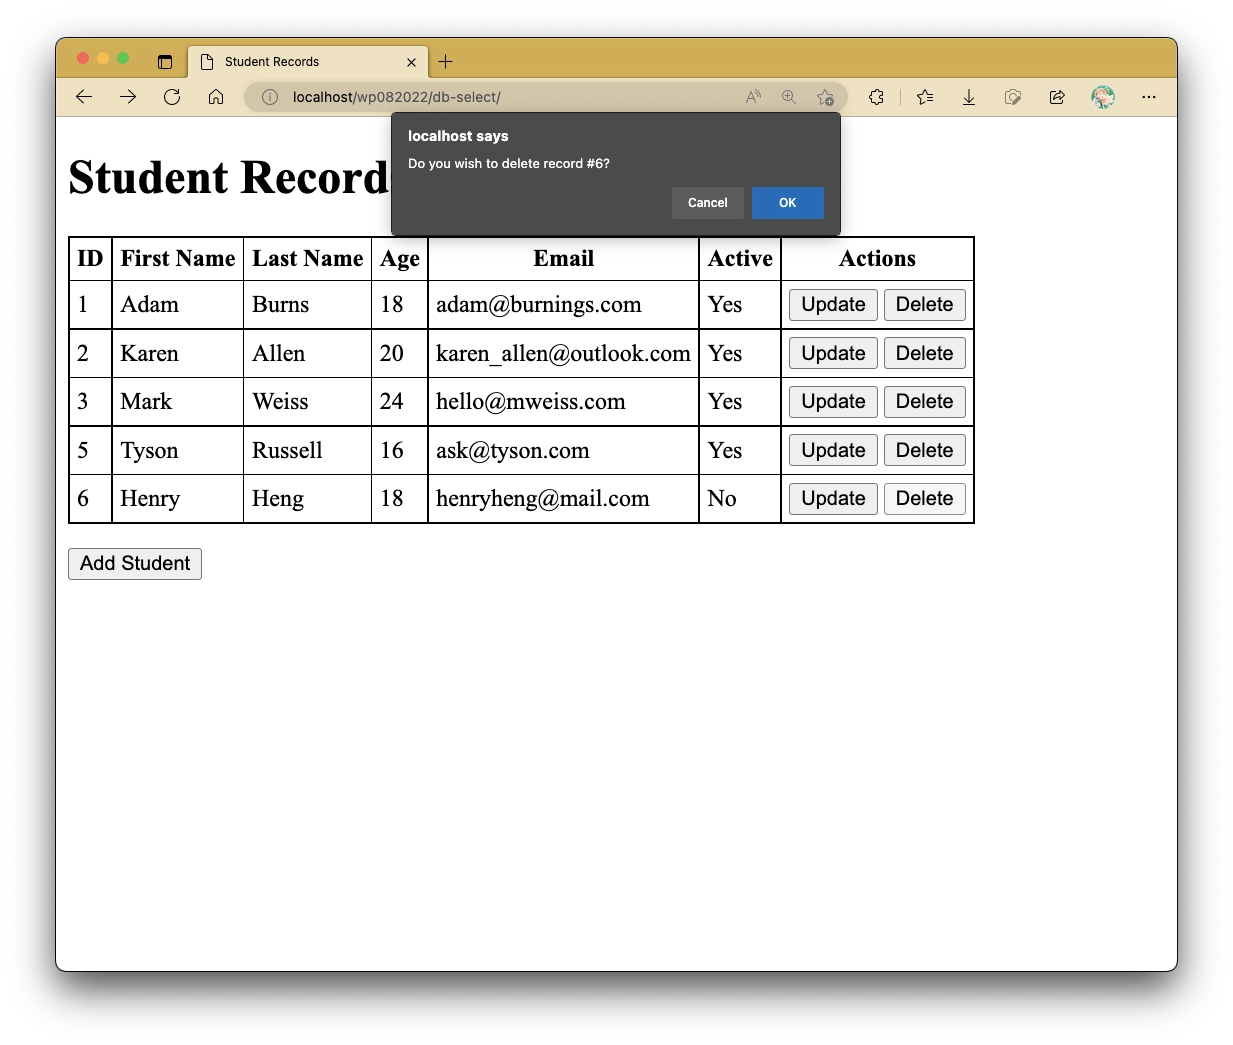
In the index.php file, the delete button in each row invokes the JavaScript function to prompt the user first before proceeding with deletion of the data.
Should the user then proceed to do so, the user is redirected to the delete-student.php file with the ID as the GET value.
Like update-student.php, it redirects the users back to index.php if no GET value of name id is present.
<?phpif(!isset($_GET["id"]))header("Location: index.php");require"db-connect.php";$id=$_GET["id"];$sql="DELETE FROM `Student` WHERE `id` = ".$id;// echo $sql;// Run the SQL statementif($conn->query($sql)){echo"Deleted record with ID ".$id." successfully";// Redirect to index.php after successful updateheader("Location: index.php");}elseecho"Error deleting record ".$id.": ".$conn->error;
After deletion, the table should portray the remaining rows left in the table.
Challenge?
You may have noticed that in some of the displayed outputs, the IDs do not follow a proper order.
This is mainly due to the fact that they are only reliant on the IDs that are set in the database as per the AUTO_INCREMENT constraint on the id column.
However, this does not present well for a typical user who may not understand this mechanism.
How would you edit the presented IDs to resemble the typical ascending order flow? (i.e., 1, 2, 3, 4, ...)
This was heavily based on the second of three code-along series videos I created for ITS30605.
The guide below has been updated with extra information about the security implications through using prepared SQL statements.
An injection vulnerability is an application flaw that allows untrusted user input to be sent to an interpreter (e.g. a browser, database, the command line) and causes the interpreter to execute parts of that input as commands.
With SQL injection being one of the most common kinds of injection vulnerabilities there are, we will be running through a way to mitigate this using SQL prepared statements in PHP while also demonstrating how SQL injection can be a threat to web application security.
Prepared SQL statements can be applicable to other languages which involve reading and writing to and from a database.
Test your database connection first (make sure the database is even created in the first place), and run db-create-table.php once to prepare the Employee database table needed for this lab activity.
At any point you want to reset the database table, run db-drop-table.php and then db-create-table.php once more.
Note that db-create-drop.php requires style.css for proper appearance, which is also provided below.
<?phpif($_POST&&in_array(intval($_POST["radio_db"]),[0,1])){$servername="127.0.0.1";// or "localhost", but that may or may not work on Herd$username="root";$password="";// fill up if necessary$conn=newmysqli($servername,$username,$password);// Check connection; if error occurs, display error message and force exitif($conn->error){die("Connection failed: ".$conn->connect_error);}$db_name="newDB";switch(intval($_POST["radio_db"])){case1:$sql="CREATE DATABASE IF NOT EXISTS `".$db_name."`";$msg=["success"=>"Database created successfully.","error"=>"Error creating database: "];break;case0:$sql="DROP DATABASE IF EXISTS `".$db_name."`";$msg=["success"=>"Database dropped successfully.","error"=>"Error dropping database: "];break;default:$sql="";$msg=["success"=>"","error"=>""];}if($sql){// Run the SQL statement inside $sql; returns TRUE if successful// $conn->error retrieves the latest error message generated from the MySQL serverecho($conn->query($sql))?$msg["success"]:$msg["error"].$conn->error;}$conn->close();}?> <!DOCTYPE html> <html lang="en"> <head> <meta charset="UTF-8"> <meta name="viewport" content="width=device-width, initial-scale=1.0"> <title>Create or Drop Database</title> <link rel="stylesheet" href="../css/style.css"> </head> <body> <div id="form"> <form action="create-drop-db.php" method="post"> <h1>Create or Drop Database</h1> <fieldset> <legend>Select action:</legend> <div> <input type="radio" name="radio_db" id="db_create" value="1"> <label for="db_create">Create Database</label> </div> <div> <input type="radio" name="radio_db" id="db_drop" value="0"> <label for="db_drop">Drop Database</label> </div> </fieldset> <hr /> <br /> <input type="submit" value="Submit"> <input type="reset" value="Reset"> </form> </div> </body> </html>
<?php$servername="127.0.0.1";// or "localhost", but that may or may not work on Herd$username="root";$password="";// fill up if necessary$dbName="newDB";$conn=newmysqli($servername,$username,$password,$dbName);if($conn->connect_error)die("Connection failed: ".$conn->connect_error);
<?phprequire"db-connect.php";$sql="DROP TABLE IF EXISTS `Employee`;";if($conn->query($sql))echo"Table dropped successfully!";elseecho"Error dropping table: ".$conn->error;$conn->close();
These are the starter core files for this lab activity's website.
As you may or may not have noticed, we do not have db-insert.php yet, of which the <form> element uses as the acting script to process its contents.
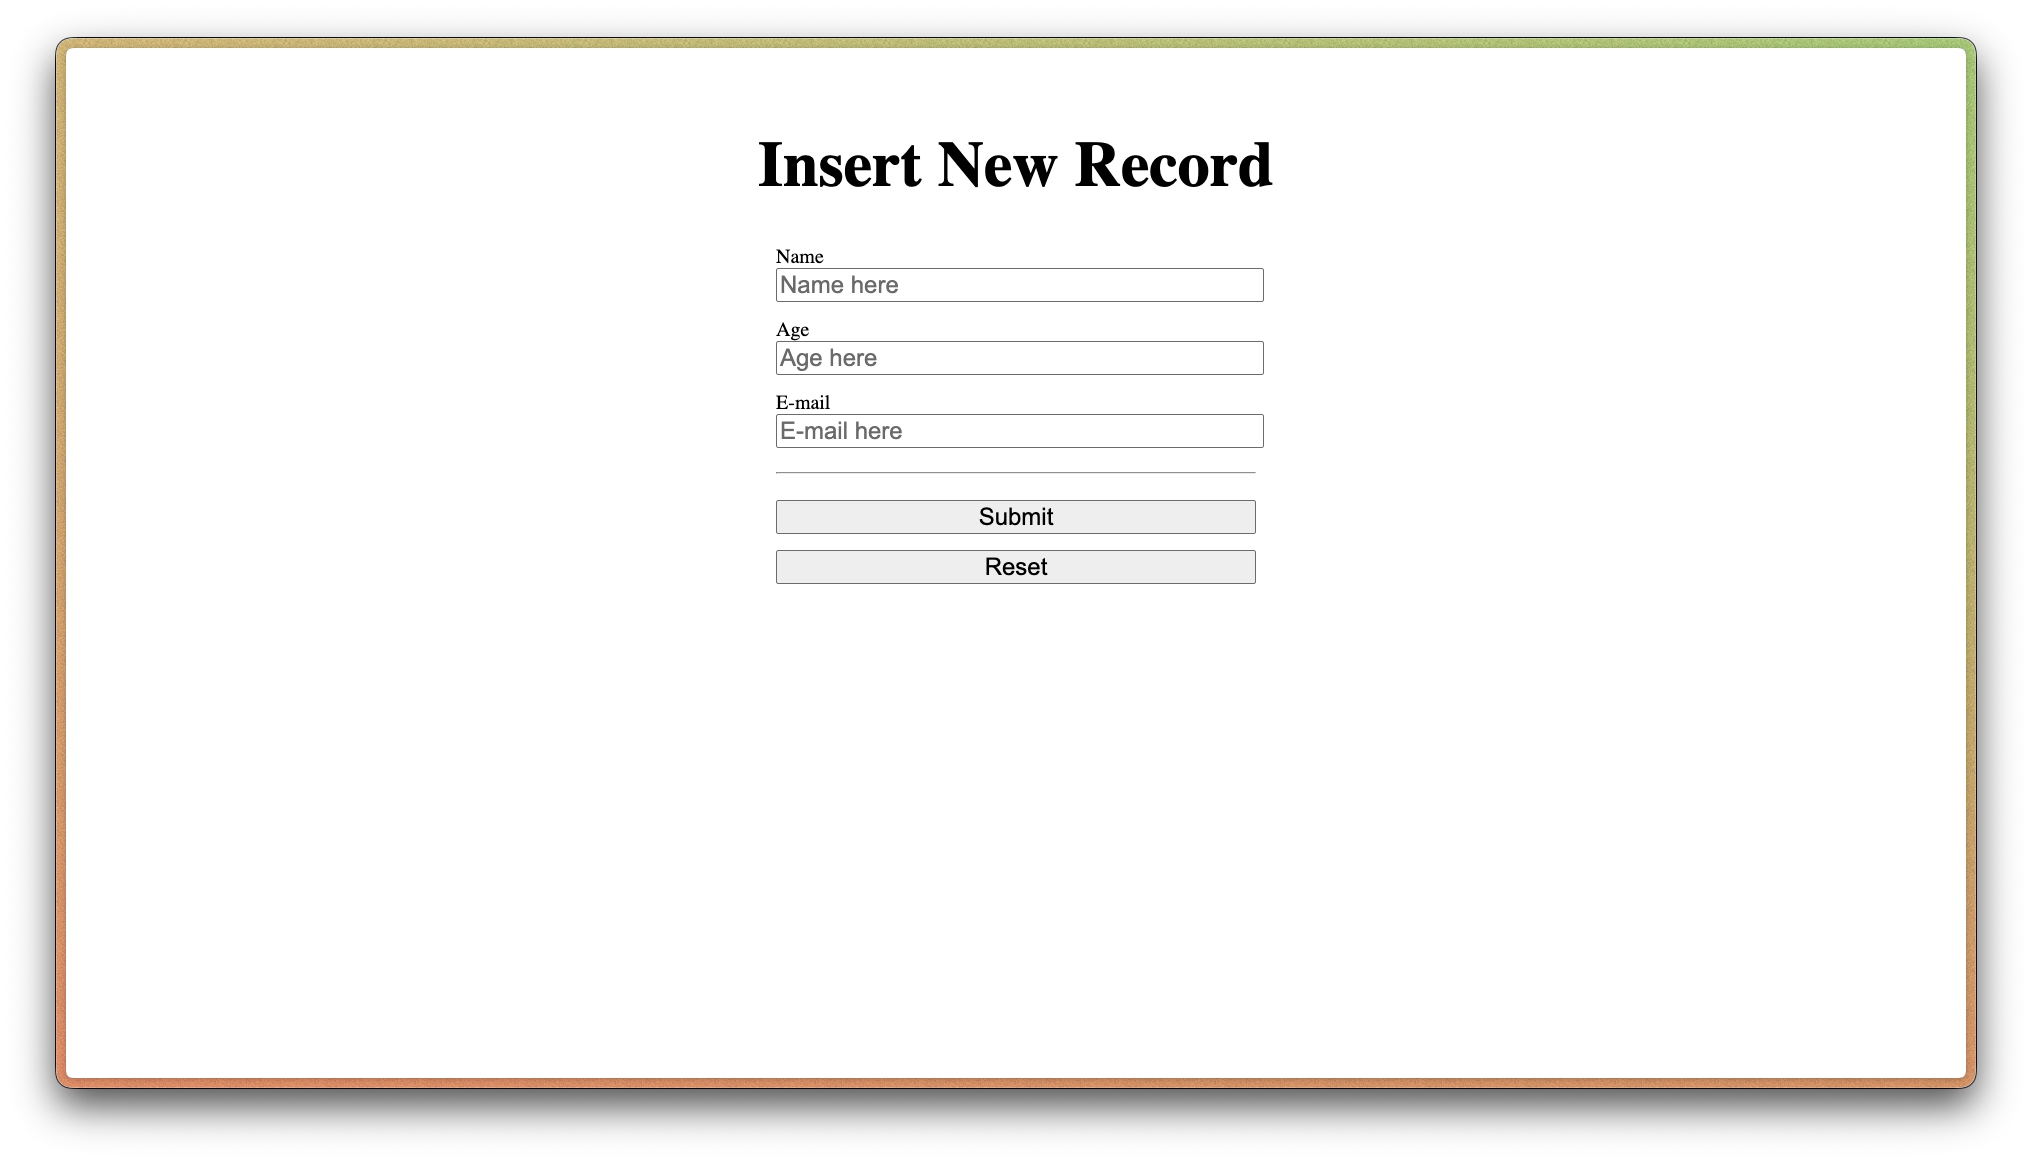
<!DOCTYPE html><htmllang="en"><head><metacharset="UTF-8"/><metaname="viewport"content="width=device-width, initial-scale=1.0"/><title>Insert New Record</title><linkrel="stylesheet"href="css/style.css"/></head><body><h1>Insert New Record</h1><divid="form"><formaction="db-insert.php"method="post"autocomplete="nope"><labelfor="in_name">Name</label><inputtype="text"name="in_name"id="in_name"placeholder="Name here"autocomplete="off"value=""/><labelfor="in_age">Age</label><inputtype="number"name="in_age"id="in_age"placeholder="Age here"autocomplete="off"min="1"value=""/><labelfor="in_email">E-mail</label><inputtype="email"name="in_email"id="in_email"placeholder="E-mail here"autocomplete="off"value=""/><hr/><br/><inputtype="submit"value="Submit"/><inputtype="reset"value="Reset"/></form></div></body></html>
body>div{margin:auto;}body>div#form{max-width:30rem;}h1{font-size:4rem;margin-top:5rem;text-align:center;}/* index.php only */table{border-collapse:collapse;margin:auto;font-size:24px;}th,td{border:1pxsolidblack;}th:first-of-type,td:first-of-type,td:nth-of-type(3){text-align:center;width:50px;}td:nth-of-type(2),td:nth-of-type(4){min-width:250px;}th:not(:first-of-type),td:not(:first-of-type){padding-left:10px;padding-right:10px;}tablebutton{font-size:16px;margin-bottom:5px;}/* forms only */p{font-size:20px;}forminput{font-size:24px;margin-bottom:1rem;}forminput:not([type="radio"]){width:100%;}label,fieldset>legend{font-size:20px;}fieldset{padding:20px;}/*** Remove Arrows/Spinners* Reference: https://www.w3schools.com/howto/howto_css_hide_arrow_number.asp*//* Chrome, Safari, Edge, Opera */input::-webkit-outer-spin-button,input::-webkit-inner-spin-button{-webkit-appearance:none;margin:0;}/* Firefox */input[type="number"]{--moz-appearance:textfield;}
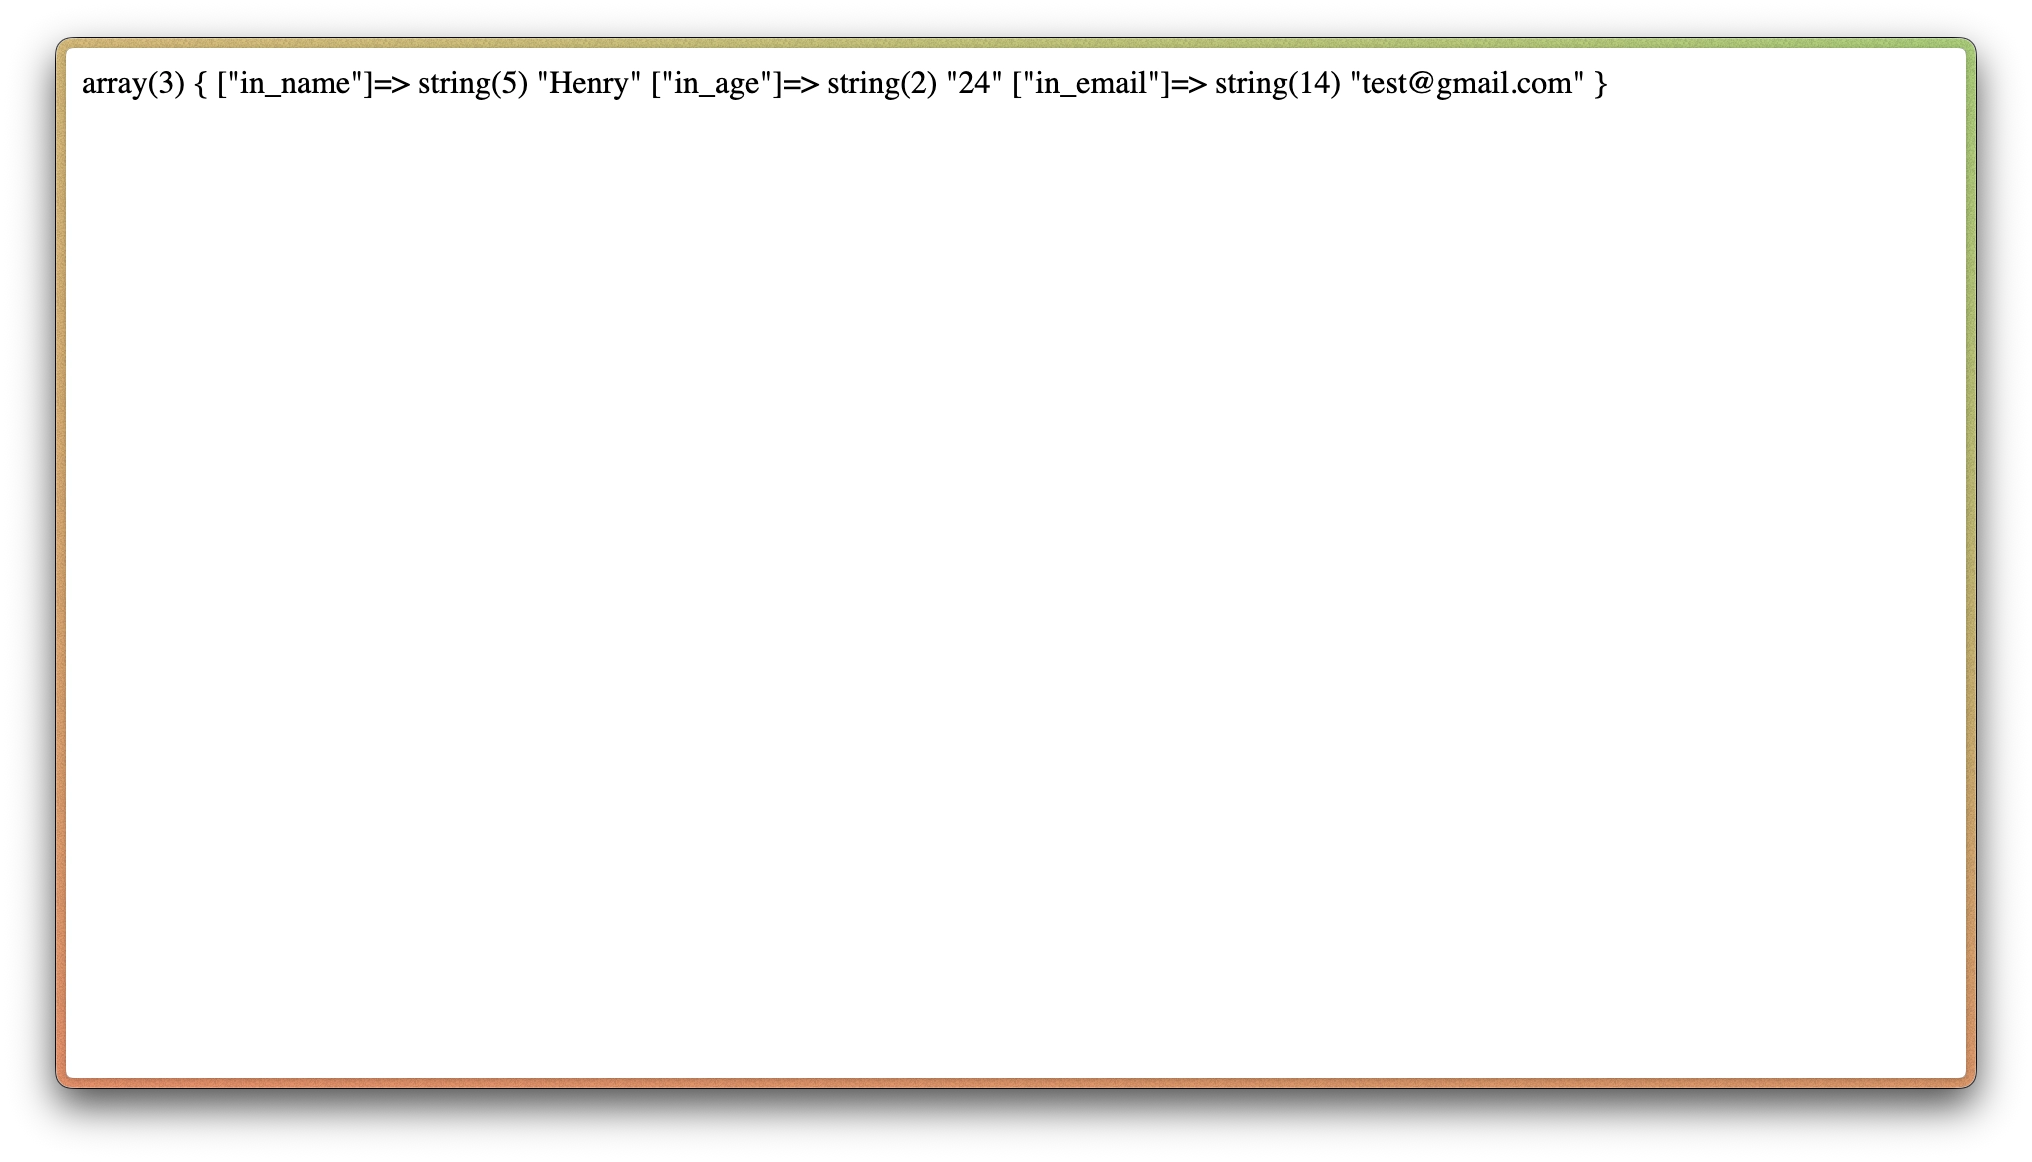
<?phpif($_SERVER["REQUEST"]=="POST"){require"db-connect.php";// This is to check if we have retrieved information from the form as intended.var_dump($_POST);}
You should see something like as follows after submitting the form:
Success!
Let's now work on inserting the retrieved form information into the Employee database table.
Before we proceed, let's look at what can happen with what we already know about inserting records with the previous method.
If we used what we already know at this point, db-insert.php should take shape like as follows:
<?phpfunctioninsertQuotationMarks($str=''){return"'".$str."'";}if($_SERVER["REQUEST_METHOD"]=="POST"){require"db-connect.php";// This is to check if we have retrieved information from the form as intended.// var_dump($_POST);$sql="INSERT INTO `Employee`(`name`, `age`, `email`) VALUES (".implode(', ',[insertQuotationMarks($_POST['in_name']),$_POST['in_age'],insertQuotationMarks($_POST['in_email'])]).")";echo$sql;}
Suppose you filled up the form as intended, the $sql statement formed can be something like as follows:
On the surface, the form works as intended.
However, doing the following is also possible:
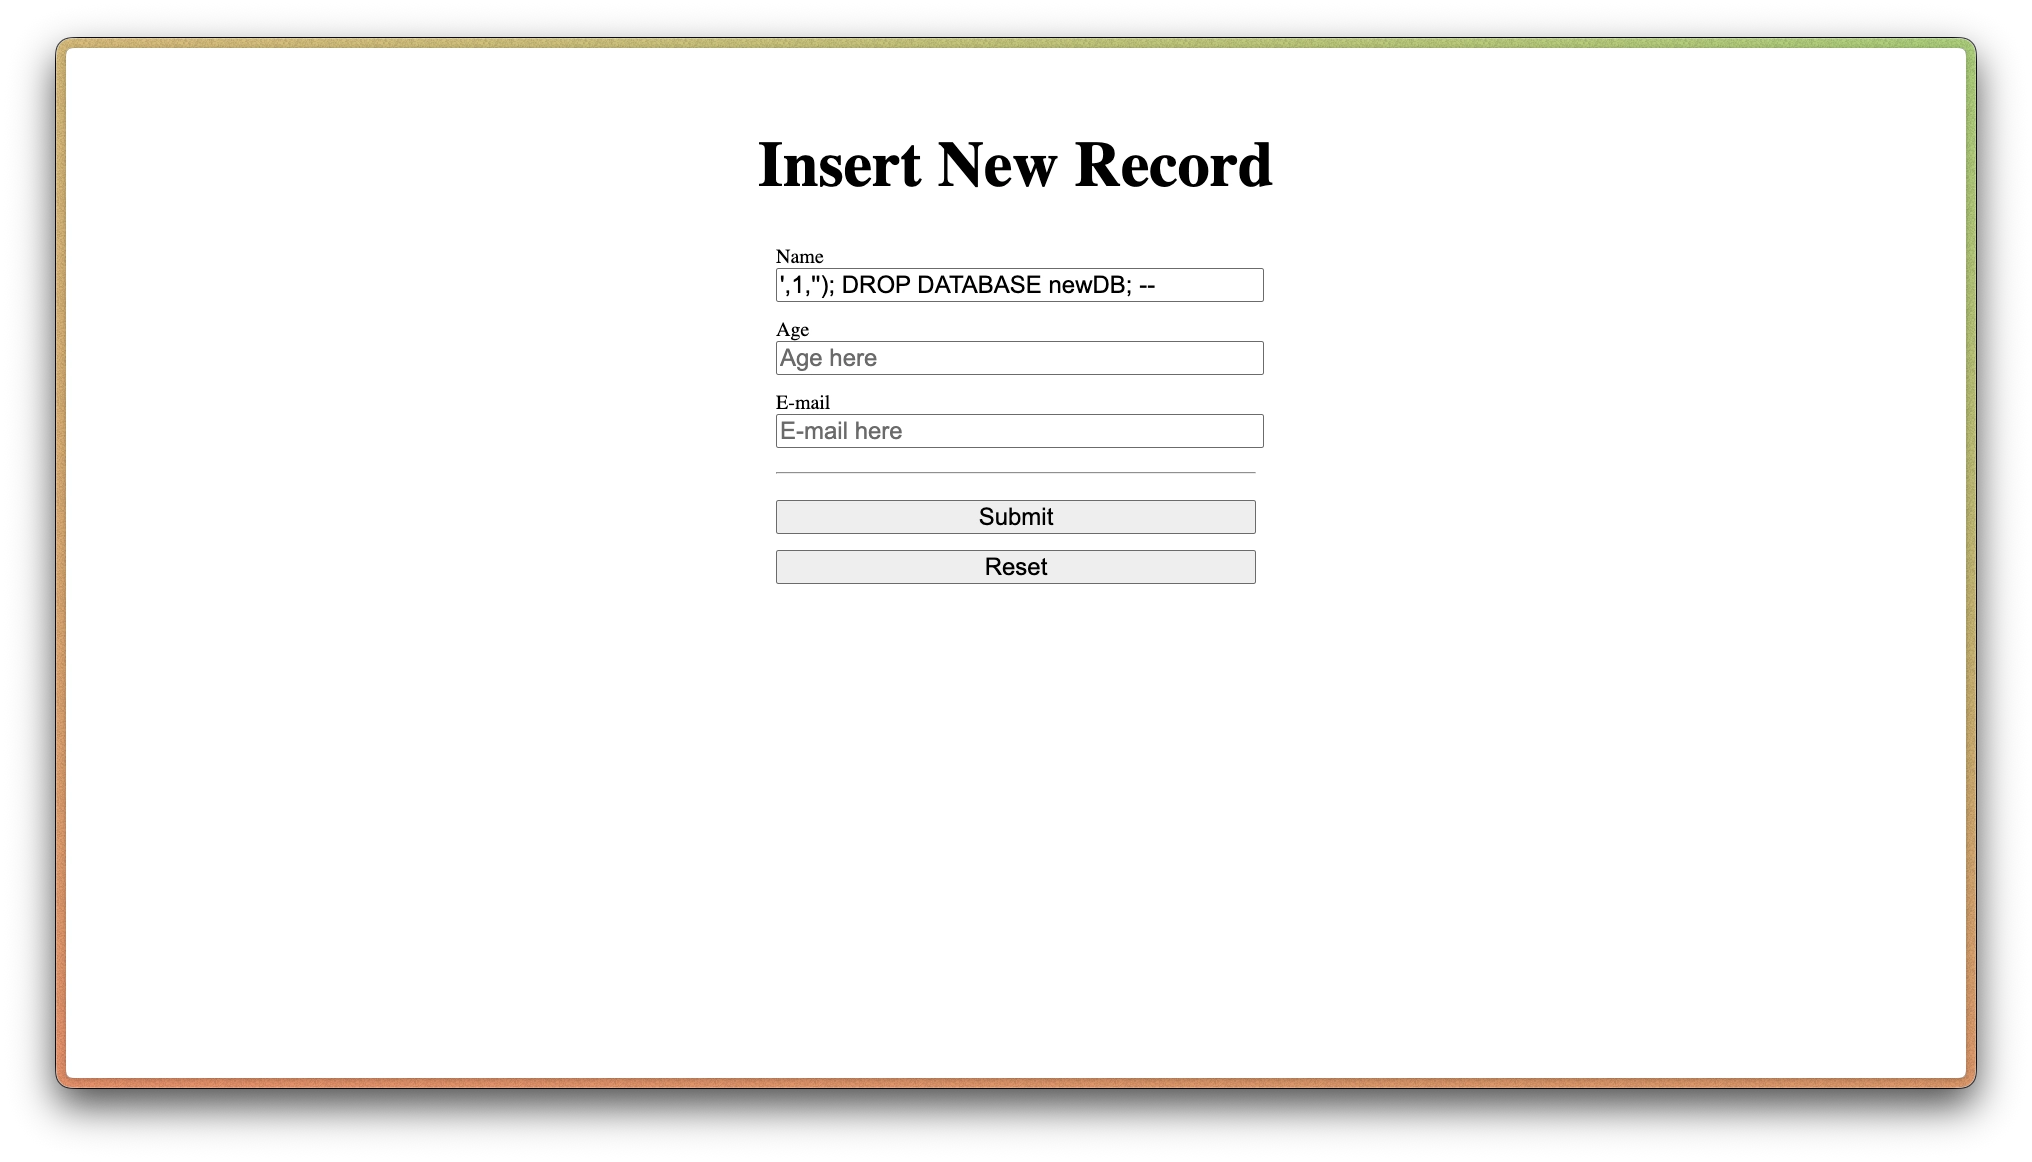
Simply enter the following into the first input field: ',1,''); DROP DATABASE newDB; --, and leave the rest of the input fields empty (this will work unless all input fields are required, as such just enter in anything to the remaining input fields).
When you submit the form, you will get the following SQL statement(s):
This is quite fictional, assuming that a bad actor knows or assumes the database name is newDB and intends on deleting said database.
It is still very serious, since it practically violates the availability of the web application's data.
Something more likely could be (not an exhaustive list):
modifying an existing Employee record, effectively tampering them (and hence violating the integrity of the web application's data)
displaying all data inside the Employee table, violating the confidentiality of data kept for use by the web application
Note the use of terms: confidentiality, integrity, availability.
These form the properties of the CIA Triad; feel free to refer to this video here for more.
This is very simple to exploit, if done correctly.
Even if it involves a lot of guess work, just having the avenue for bad actors to mess up a web application this way is simply nuts.
Using SQL prepared statements is a better alternative to mitigate this problem from even happening.
To prepare an SQL statement, first insert a question mark '?' for each column you wish to fill up in the last round parentheses in $sql.
"INSERT INTO `Employee`(`name`, `age`, `email`) VALUES (?, ?, ?);"
From here, we use the prepare() method under our $conn object on our $sql variable, and assign that to $stmt.
This method prepares the SQL query, and returns a statement handle to be used for further operations on the statement.
From here, we start binding the parameters meant to be part of the SQL query (i.e., inserting parameters, but in a different way).
The bind_param() method takes in at least 2 parameters - the second parameter onwards are the parameters (in order of how we want them).
The first parameter here seems to be a garbled string, but it indicates how we wish to treat each of the parameters in terms of their data types.
For each of the SQL query parameters, indicate one of the following in order of appearance (source here):
Character
Description
i
Corresponding value is an integer (int data type)
d
Corresponding value is a float (float data type)
s
Corresponding value is a string (string data type)
b
Corresponding value is a blob (to send as data packets)
In our case, the name, age and email columns take in string, int, and string data types respectively.
Hence, the first parameter we should enter into the bind_param() method is "sis".
From here, we then use the execute() method under the $stmt object to execute the SQL query.
At each juncture, output any errors encountered as and when necessary.
<?phpif($_SERVER["REQUEST_METHOD"]=="POST"){require"db-connect.php";// This is to check if we have retrieved information from the form as intended.// var_dump($_POST);$sql="INSERT INTO `Employee`(`name`, `age`, `email`) VALUES (?, ?, ?);";$stmt=$conn->prepare($sql);if($stmt){$name=$_POST['in_name'];$age=intval($_POST['in_age']);$email=$_POST['in_email'];$stmt->bind_param("sis",$name,$age,$email);if($stmt->execute()){$id=mysqli_insert_id($conn);$stmt->close();$conn->close();echo"Inserted new record with ID: ".$id;// Can comment out; for debugging purposes only// Once you have tested that this works, add the following to simulate redirecting to index.php after successful insertion.header("Location: .");// or header("Location: index.php");exit();// Use this after each time header() is used to prevent executing the remaining code on the server// Or, if you prefer doing that using JavaScript: document.location.href = <redirected page>}elseecho"Error adding record to table: ".$stmt->error;}elseecho"Unable to prepare SQL statement: ".$conn->error;// Clean up database connection if execution reached an error stateif(isset($stmt))$stmt->close();$conn->close();}else{// Kick unauthorized GET requests back to the main directoryheader("Location: .");// or header("Location: index.php");exit();}
We have only covered how to insert a record into our database table using prepared statements, but feel free to add on to this by implementing some extra guard checks (e.g., age validation, email validation) to enhance this page further.
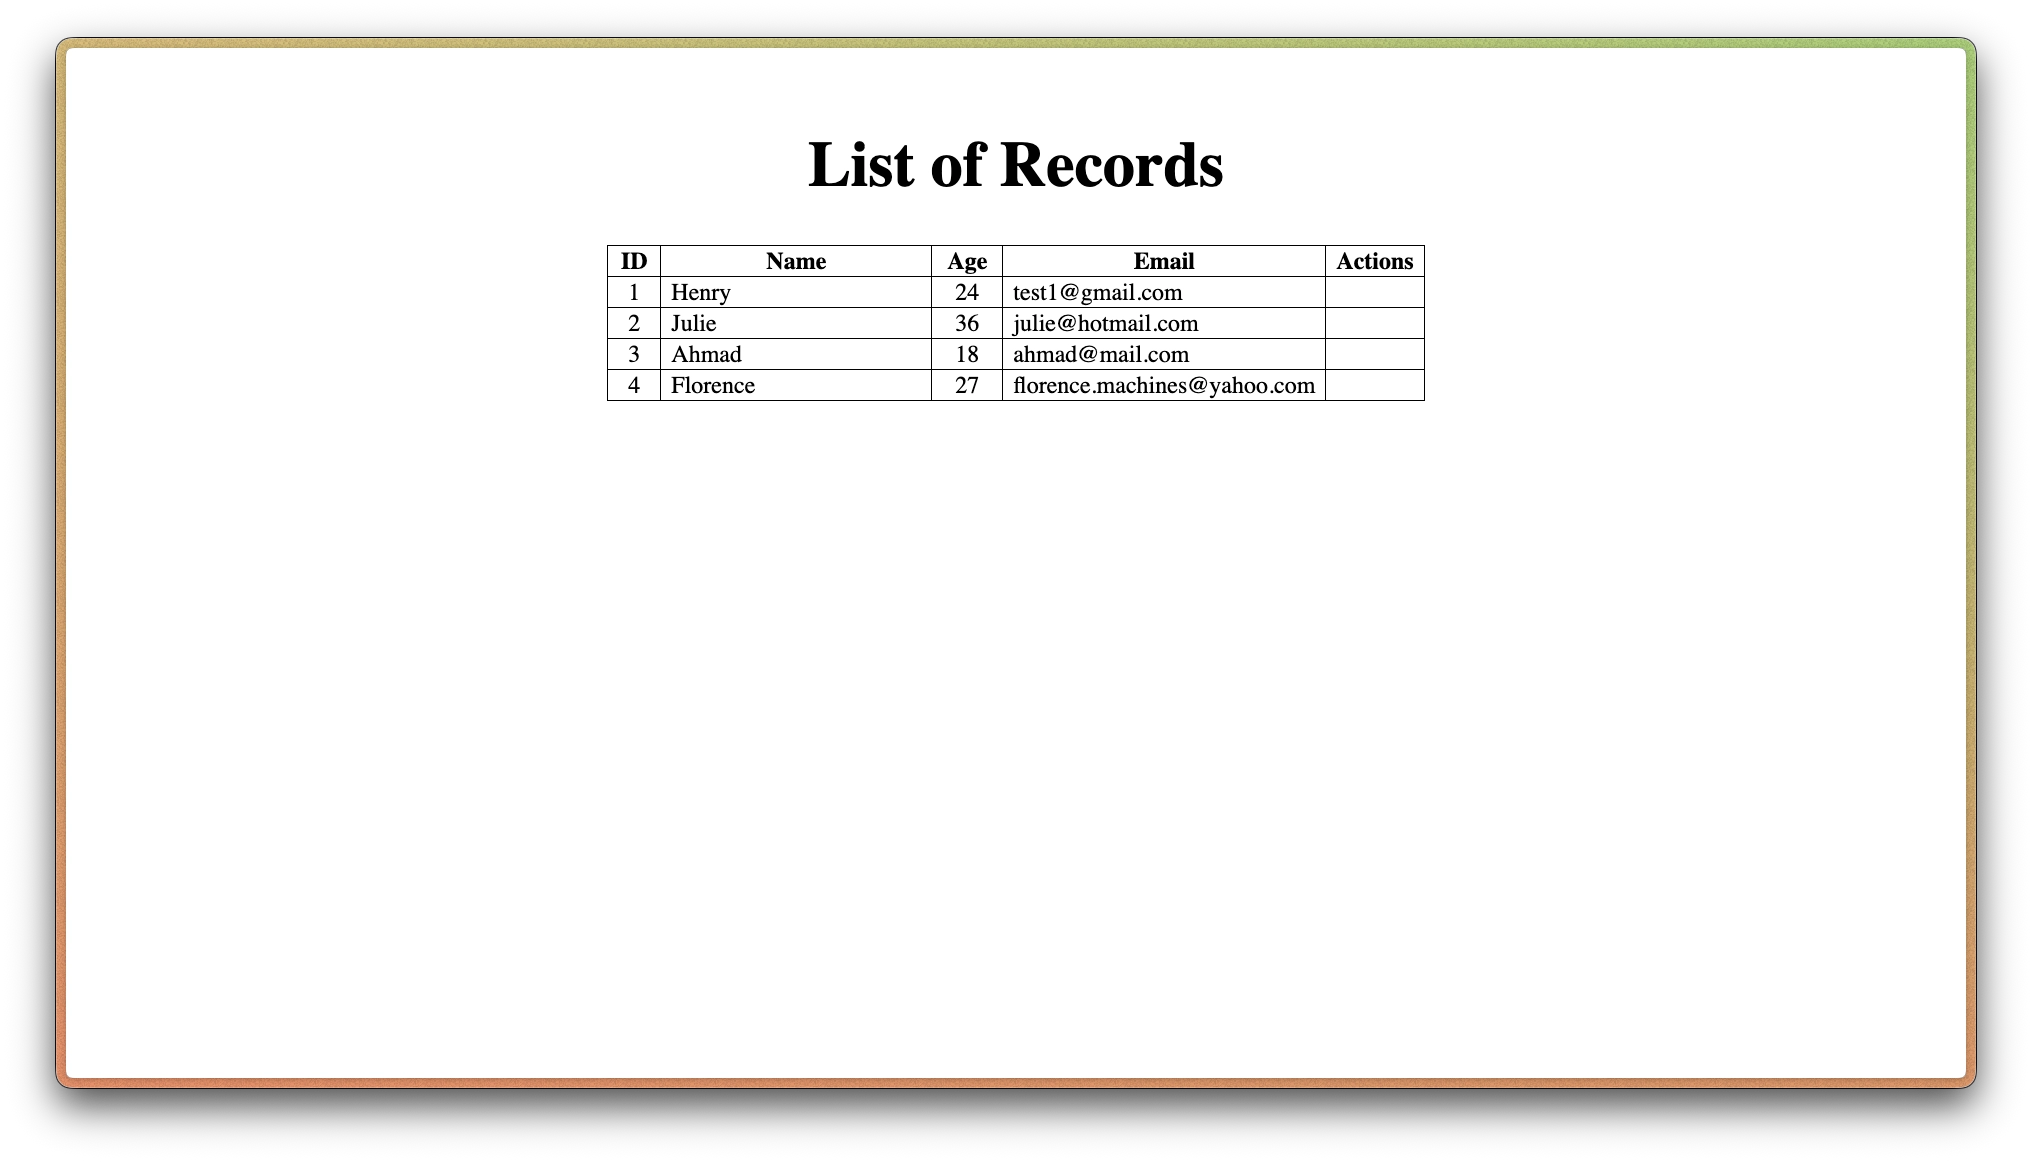
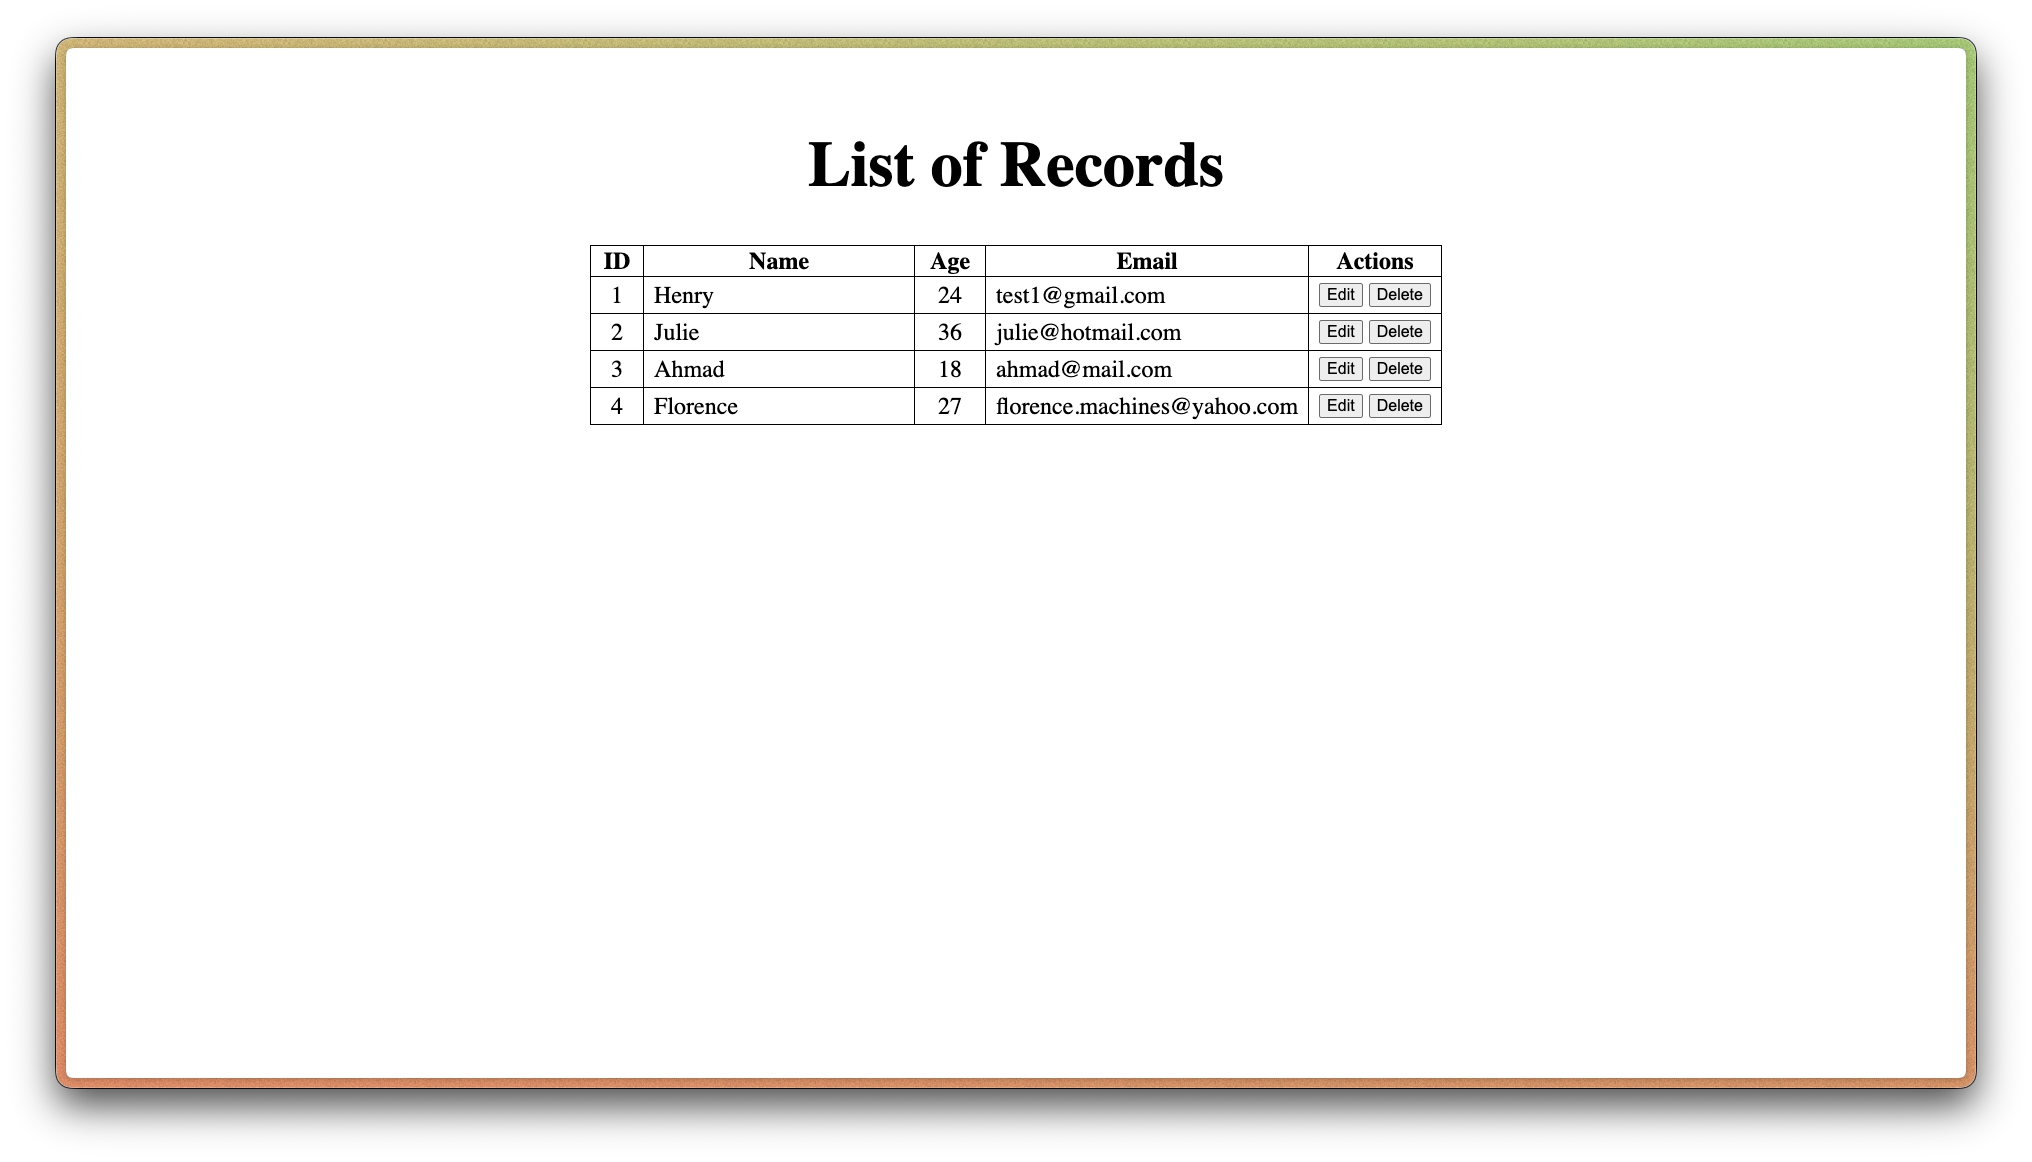
You should now see a pair of "Edit" and "Delete" buttons appear on the right hand side of each record:
Here comes two more tasks we have to carry out in this lab activity - facilitating the updating and deleting of records.
Let's focus on the updating part first.
Notice that for each "Edit" button, it redirects you to form.php again, but with a $_GET value id.
There's a more elegant way of incorporating this (and there's a security risk in guessing which id to change), but we will keep this for simplicity and showing how any of $_GET and $_POST can be used in an update form.
Challenge
If you would really like to incorporate use of $_POST instead of $_GET here, feel free to try it out as a challenge!
You will need to surround either each "Edit" button or the whole table with a <form> element to enable this behavior.
<?phpif(isset($_GET['id'])){require"db-connect.php";$sql="SELECT * FROM `Employee` WHERE `id` = ?";$stmt=$conn->prepare($sql);$id=intval($_GET['id']);$stmt->bind_param("i",$id);if($stmt->execute()){$result=$stmt->get_result();if($result->num_rows==1){// we only expect 1 record to be selected, since we target by ID$record=$result->fetch_assoc();foreach($recordas$key=>$val){$record[$key]=htmlspecialchars($val);}$action="db-update.php";$title="Update Record";}elsedie("<p>No record found for ID ".$id."</p>");}elsedie("<p>Error retrieving record with ID ".$id."</p>");}else{$title="Insert New Record";$action="db-insert.php";$record=[];}?><!DOCTYPE html><html lang="en"><head> <meta charset="UTF-8" /> <meta name="viewport" content="width=device-width, initial-scale=1.0" /> <title><?=$title?></title> <link rel="stylesheet" href="../css/style.css" /></head><body> <h1><?=$title;?></h1> <div id="form"> <form action="<?=$action?>" method="post" autocomplete="nope"><?phpif($action==="db-update.php"):?> <input type="hidden" name="in_id" value="<?=$id?>" /><?phpendif;?> <label for="in_name">Name</label> <input type="text" name="in_name" id="in_name" placeholder="Name here" autocomplete="off" value="<?=$record['name']??''?>" /> <label for="in_age">Age</label> <input type="number" name="in_age" id="in_age" placeholder="Age here" autocomplete="off" min="1" value="<?=$record['age']??''?>" /> <label for="in_email">E-mail</label> <input type="email" name="in_email" id="in_email" placeholder="E-mail here" autocomplete="off" value="<?=$record['email']??''?>" /> <hr /> <br /> <input type="submit" value="Submit" /> <input type="reset" value="Reset" /> </form> </div></body></html>
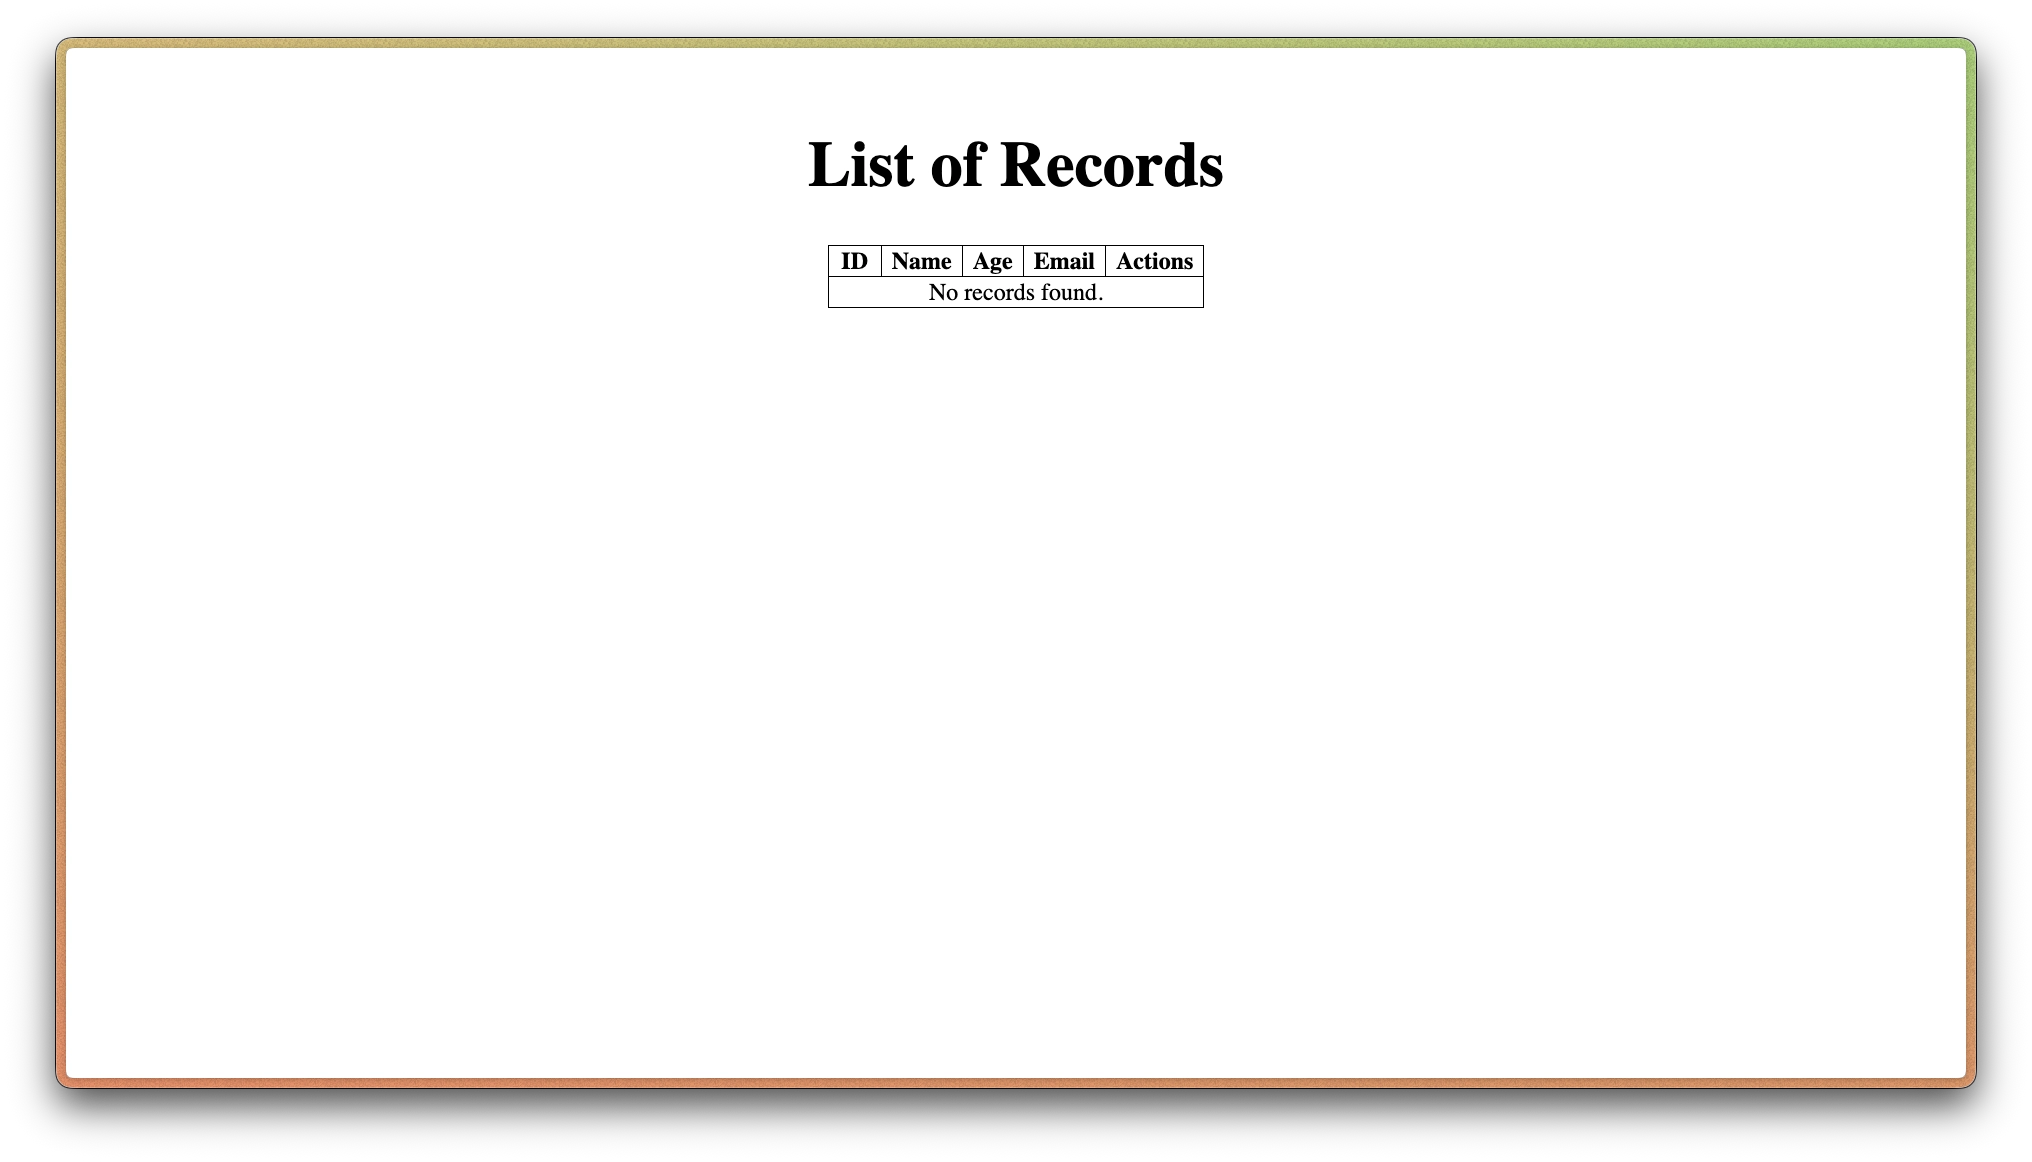
Following the trend of using SQL prepared statements, lines 1-30 show how it's like to do the same thing but with SELECT queries.
Additionally,
both the title and the <form>'s action attribute are now subject to whether there exists $_GET['id'] to begin with (to change to "Update Record"), and maintained as "Insert New Record" otherwise
a hidden <input> element with id "in_id" is added if the <form>'s action attribute value had changed to "db-update.php"
the other <input> element values are pre-populated if the associated $record's contents was retrieved successfully from the database
Now, our current implementation of form.php is ready for both inserting new records and updating existing records from the Employee table.. nice!
Let's turn our attention to creating db-update.php now - the contents are largely the same, save for the SQL query required.
<?phpif($_SERVER["REQUEST_METHOD"]=="POST"){require"db-connect.php";$sql="UPDATE `Employee` SET `name` = ?, `age` = ?, `email` = ? WHERE `id` = ?;";$stmt=$conn->prepare($sql);if($stmt){$name=$_POST['in_name'];$age=intval($_POST['in_age']);$email=$_POST['in_email'];$id=intval($_POST['in_id']);$stmt->bind_param("sisi",$name,$age,$email,$id);if($stmt->execute()){$stmt->close();$conn->close();echo"Updated record with ID: ".$id;// Can comment out; for debugging purposes only// Once you have tested that this works, add the following to simulate redirecting to index.php after successful insertion.header("Location: .");// or header("Location: index.php");exit();// Use this after each time header() is used to prevent executing the remaining code on the server// Or, if you prefer doing that using JavaScript: document.location.href = <redirected page>}elseecho"Error updating record: ".$stmt->error;}elseecho"Unable to prepare SQL statement: ".$conn->error;// Clean up database connection if execution reached an error stateif(isset($stmt))$stmt->close();$conn->close();}else{// Kick unauthorized GET requests back to the main directoryheader("Location: .");// or header("Location: index.php");exit();}
Try updating any of the existing records in your database table, and see if it works!
In a similar fashion with the "Edit" buttons, each "Delete" button contains on onclick attribute that invokes deleteConfirm() with the respective row IDs passed in as the sole parameter.
So far, we have worked extensively from the PHP side, but not once did we touch on any JavaScript - which means we do not have deleteConfirm() defined yet.
Inside main.js, implement the function as follows:
functiondeleteConfirm(id){constresponse=confirm(`Are you sure you wish to delete record with ID ${id}?`,);if(response)document.location.href=`db-delete.php?id=${id}`;}
Again, we could try working without $_GET here, but we will stick with it for now.
Let's now create db-delete.php.
The contents are pretty similar to the PHP code we inserted on top of form.php, but with some differences relating to the SQL query and incorporates some of the same logic flow from db-update.php.
<?phpif(isset($_GET['id'])){require"db-connect.php";$sql="DELETE FROM `Employee` WHERE `id` = ?";$stmt=$conn->prepare($sql);$id=intval($_GET['id']);$stmt->bind_param("i",$id);if($stmt->execute()){$stmt->close();$conn->close();echo"Deleted record with ID: ".$id;// Can comment out; for debugging purposes only// Once you have tested that this works, add the following to simulate redirecting to index.php after successful insertion// (we pause 5 seconds for the message to go through).header("refresh:5; url=index.php");exit();// Use this after each time header() is used to prevent executing the remaining code on the server// Or, if you prefer doing that using JavaScript: document.location.href = <redirected page>}elsedie("<p>Error deleting record with ID ".$id."</p>");}else{// Kick unauthorized GET requests back to the main directoryheader("Location: .");// or header("Location: index.php");exit();}
And with that, we now have a simple web application that utilizes prepared SQL statements properly insert, select, update and delete records from the database table while mitigating SQL Injection and Cross-Site Scripting (XSS) attacks!
Lab Activity 03: Login Page with Database Records
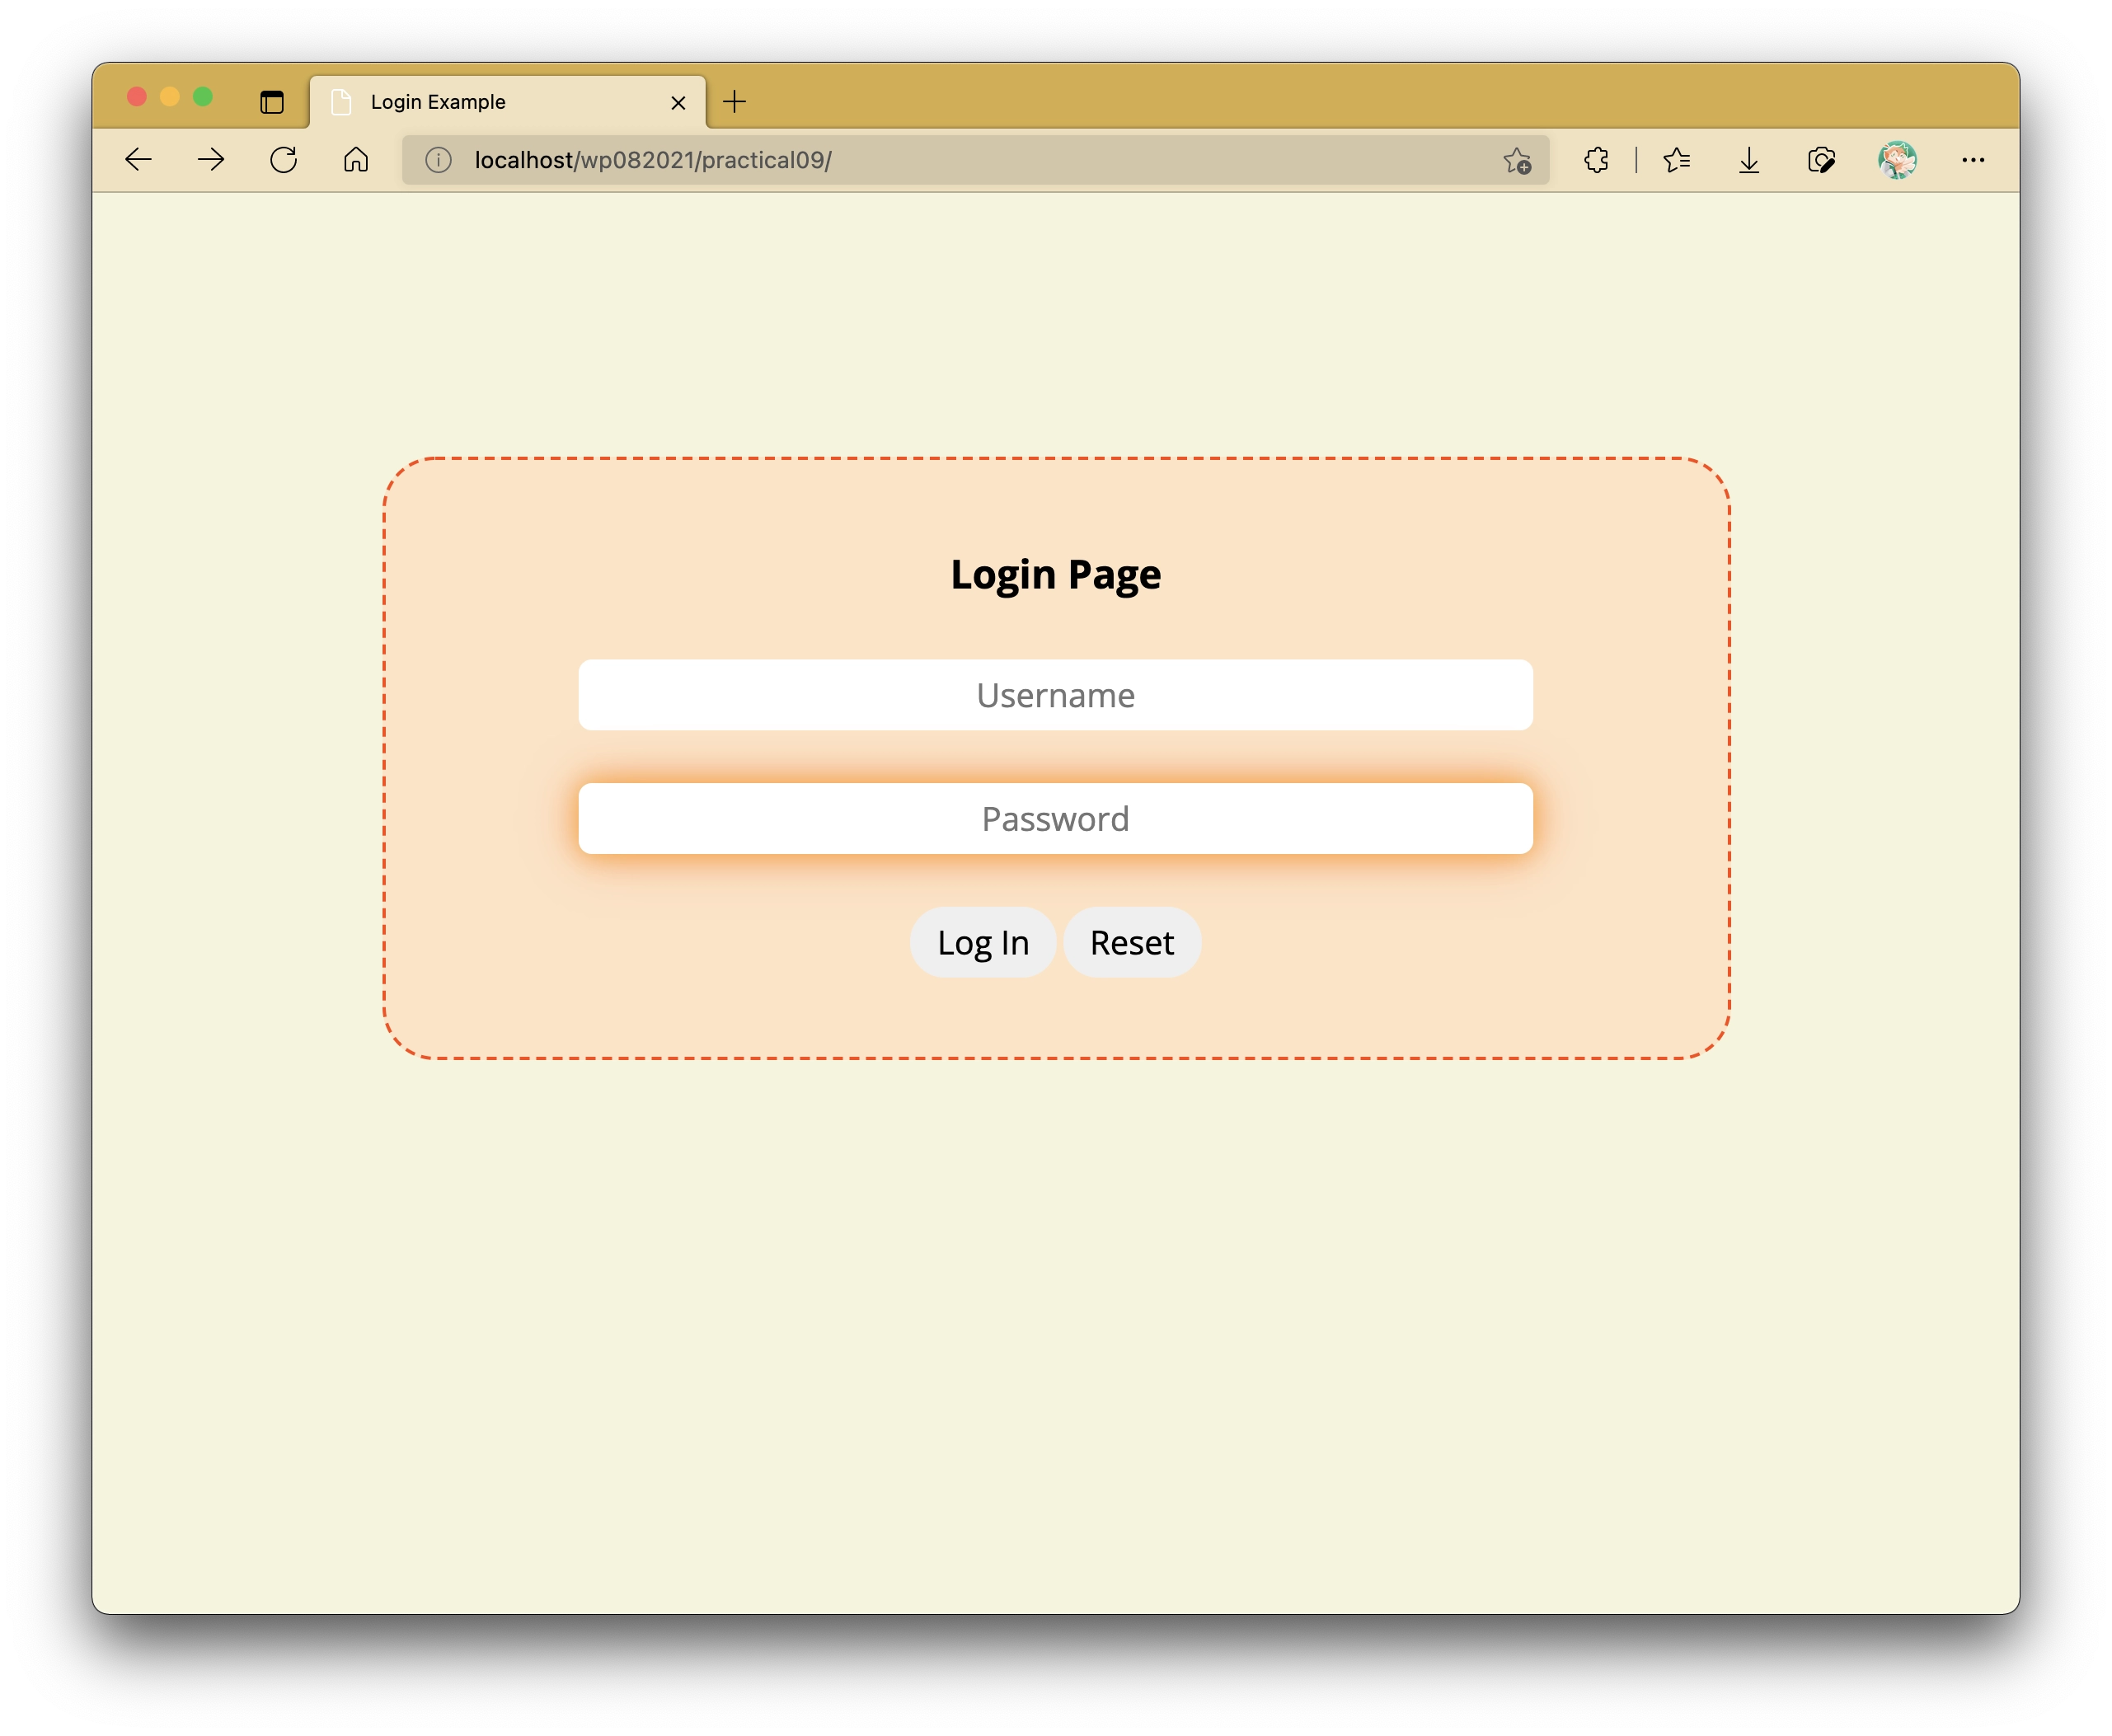
Recall where we left off from Lab 08 - this is the login page that we used but with a separate file to contain our credentials.
What we did back then was similar to utilizing a .env file to store sensitive information.
However, we will now centralize the storing of credentials in the database.
<?php$servername="127.0.0.1";// or "localhost", but that may or may not work on Herd$username="root";$password="";// fill up if necessary$dbName="newDB";$conn=newmysqli($servername,$username,$password,$dbName);if($conn->connect_error)die("Connection failed: ".$conn->connect_error);
<?phprequire"db-connect.php";$sql="INSERT INTO `Credentials` (`username`, `pw_hash`) VALUES (?, ?);";$stmt=$conn->prepare($sql);if($stmt){// Normally we would capture credential data via forms, not like this!$username="thomas_cat";$plainPassword="JerryStinks123!";// PASSWORD_DEFAULT automatically selects the strongest available algorithm (e.g., Bcrypt or Argon2)$hashedPassword=password_hash($plainPassword,PASSWORD_DEFAULT);$stmt->bind_param("ss",$username,$hashedPassword);if($stmt->execute()){$id=mysqli_insert_id($conn);$stmt->close();$conn->close();echo"Inserted new record with ID: ".$id;// Can comment out; for debugging purposes only}}
By this point, you should encounter errors of sorts when trying to open index.php.
This is normal, since we are no longer using credentials.php.
We will work on modifying the part which is responsible for retrieving the username and password in a bit.
Before we begin modifying index.php, let's pay close attention to what's been done inside db-insert.php.
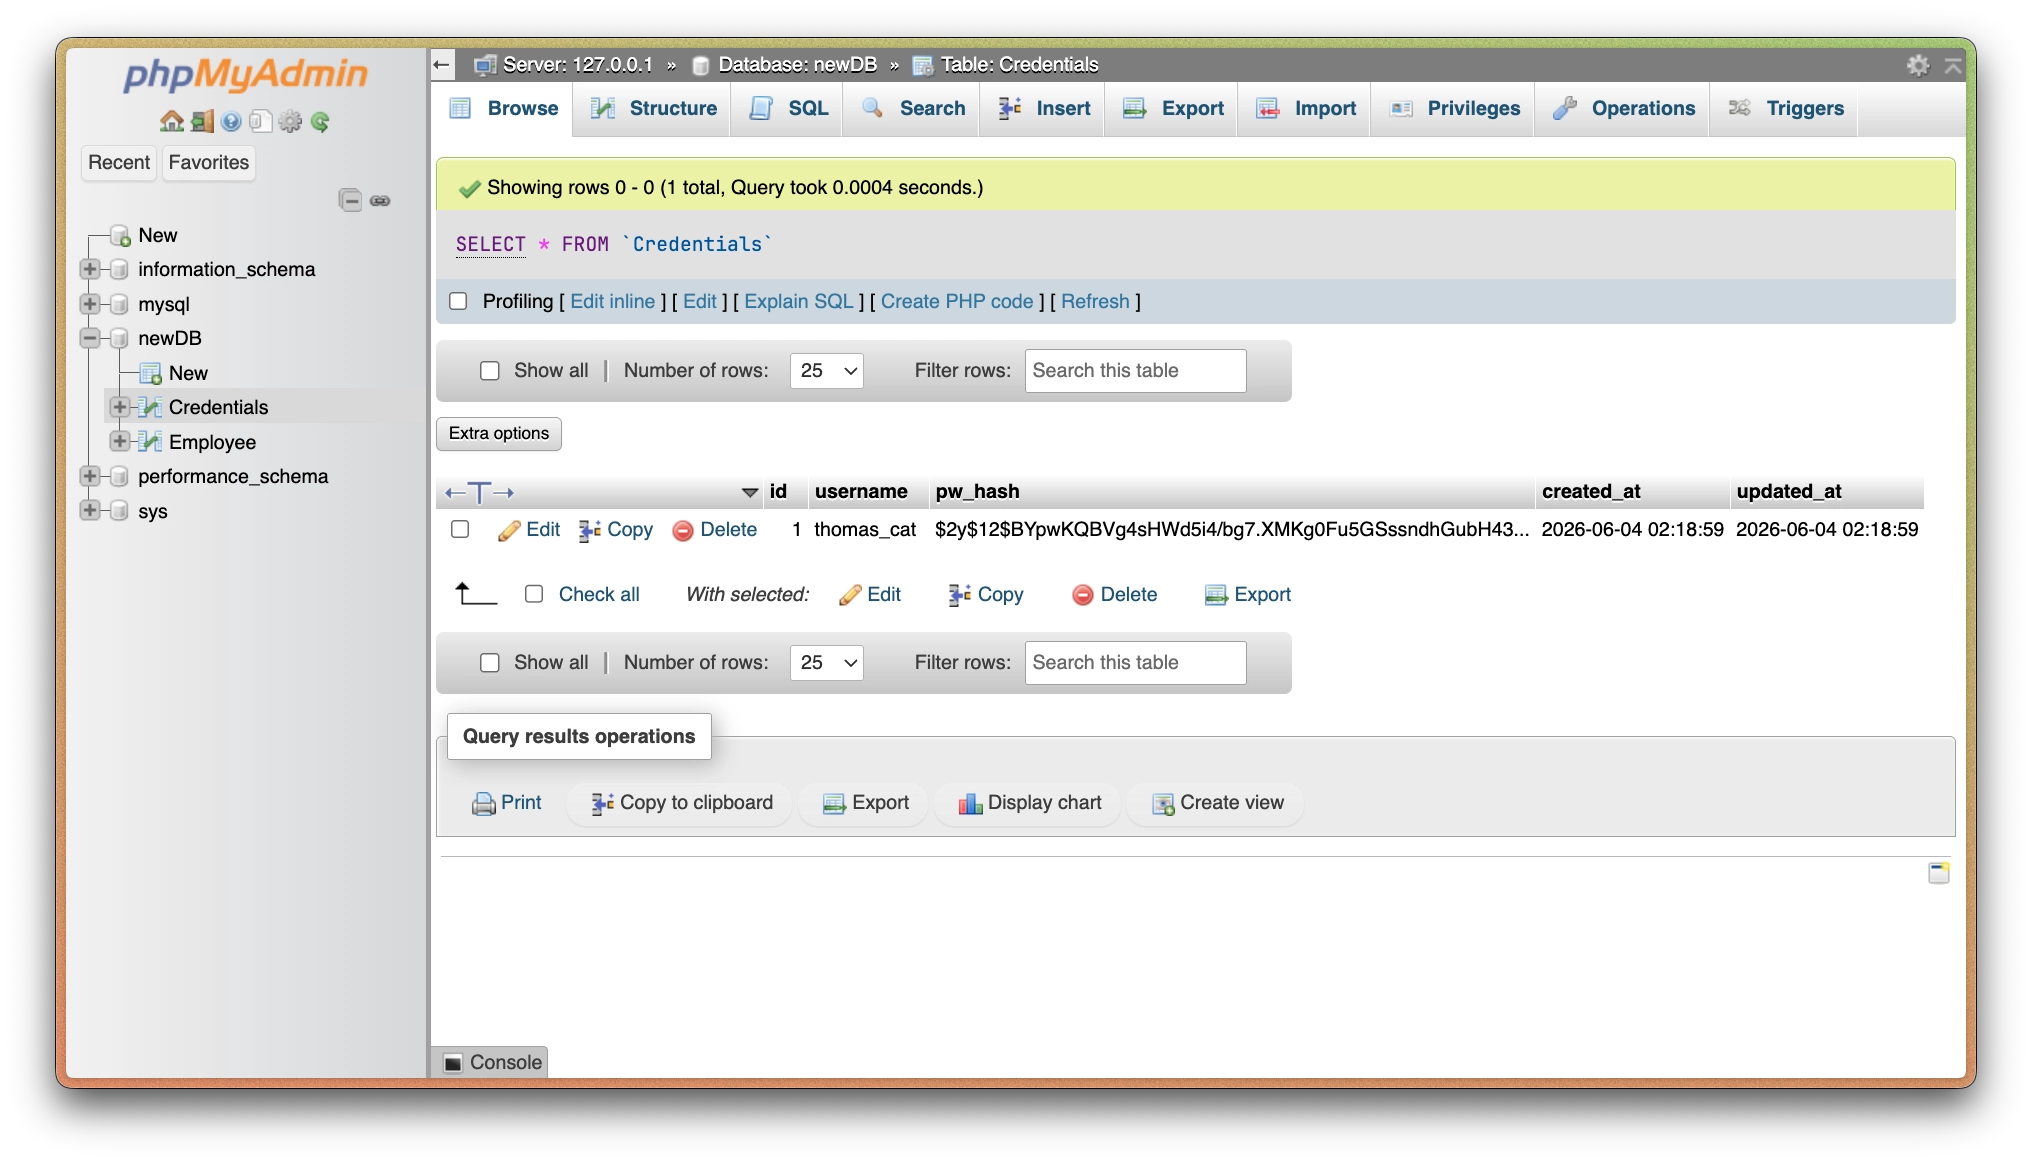
As soon as you successfully run db-insert.php, your Credentials table should look something like as follows:
Let's assume that this is what happens when we try to create a new set of credentials from an imaginary sign-up page.
The use of password_hash() here creates a new hash value using a strong one-way algorithm.
The produced hash value is nothing but a fixed-length string of jumbled characters that cannot be easily reversed or deciphered.
This process is known as password hashing.
One great benefit of password hashing is that if the databases contents falls into the hands of bad actors, credentials are not immediately compromised as there is still a need to decrypt (i.e., unscramble) the password hash, which should theoretically be impossible to do in intractable time.
The algorithms used to scramble the password string are established cryptographic algorithms such as SHA-256, Argon2 or bcrypt.
Unless we come to a point where quantum computing becomes mainstream in our daily lives, as long as our applications' safeguards are implemented properly, we can rest assured that they will remain resilient enough from rather undesirable circumstances.
Put very bluntly - no.
Cryptographic algorithms in use right now have been tried and tested by cryptographic researchers, and I believe research is still being done to create more and more robust algorithms to face off whatever technological advances can provide to overcome it altogether.
Those are much better off than what we can do in the span of a few days.. unless you are a cryptographer whose research is in this field - in such case, all power to you dude!
<?phpsession_start();require_once"db-connect.php";// We segregate checking the credentials in a separate functionfunctioncheckCreds(mysqli$conn,string$username,string$pw):bool{$sql="SELECT * FROM `Credentials` WHERE `username` = ? LIMIT 1;";$stmt=$conn->prepare($sql);if(!$stmt)returnfalse;$stmt->bind_param("s",$username);if($stmt->execute()){$result=$stmt->get_result();$record=$result->fetch_assoc();$stmt->close();if(!$record)returnfalse;if(password_verify($pw,$record['pw_hash']))returntrue;}returnfalse;}// flag to indicate whether credentials match (i.e., false) or not (i.e., TRUE)$invalid_login=false;if($_SERVER["REQUEST_METHOD"]=="POST"){// check credentials firstif(checkCreds($conn,$_POST["username"],$_POST["password"])){// Regenerate session ID to prevent session fixationsession_regenerate_id(true);$_SESSION["username"]=$_POST["username"];}else$invalid_login=true;}?>
Here, we utilize yet another function called password_verify() to verify if the password paired with the found username (if any) is correct or not.
Since the password stored inside the database is hashed, we need this special method since we do not have a quicker way similar to typically comparing strings.
This should now work with a database containing your credentials!