Node.js and NVM
Node.js offers a platform to run JavaScript in (that's not a web browser), allowing one to use JavaScript to create servers, web applications, command line tools and scripts. I believe that with a lot of the current software and/or websites we use nowadays, Node.js has now become essential on top of being ubiquitous in many software development projects. The Node Package Manager (NPM) comes to mind, where with a React.js project, for instance, you can manage all the packages and plugins required and update them accordingly.
The simplest way to install Node.js is by using the official installer downloadable from their official website, but personally I prefer having something like the Node Version Manager (NVM) to manage various versions of Node.js as and when needed.
Node Version Manager (NVM)
NVM is a very nifty tool in managing various versions of Node.js. This is very helpful especially when you are working on various projects that depend on differing versions of Node.js; some may require a legacy version of Node.js, whist others like currently ongoing or relatively newer projects demand use of a more recent yet stable version. This, to me, is much more preferable compared to uninstalling and reinstalling different versions of Node.js manually as and when needed.
Install NVM
Incomplete Guide (Sorry, I'm a macOS User! 😬)
I currently work on a macOS machine, so I am only very aware of how to go about installing NVM on the macOS platform. That being said, Herd is a multiplatform solution you can think of, in case you currently use Windows or some Linux distro. I will update this guide as and when I get more experience with this on a non-macOS machine, stay tuned!
Otherwise, there should be some guides out there that'll detail how to install NVM step-by-step.
Like with installing other software on my machine, I can install NVM using Homebrew. The Terminal command to install Homebrew is as follows:
Right after installing NVM, append the following into your .zshrc file.
This file should be in your root folder ~.
# Include the following in addition to whatever else that already exists in this file.
# If this file doesn't exist prior, create it from scratch and add the following:

export NVM_DIR="$HOME/.nvm"
  [ -s "/opt/homebrew/opt/nvm/nvm.sh" ] && \. "/opt/homebrew/opt/nvm/nvm.sh"  # This loads nvm
  [ -s "/opt/homebrew/opt/nvm/etc/bash_completion.d/nvm" ] && \. "/opt/homebrew/opt/nvm/etc/bash_completion.d/nvm"  # This loads nvm bash_completion
To start using NVM, restart your Terminal window, or run the following command immediately:
To verify if NVM is working properly, type in the following command (this should output the current version of NVM installed).
Install Node.js
Now here's the fun part, where we get to install and manage Node.js versions.
Alternatively, you can specify the version you wish to install.
Say for instance, you require Node.js v22 - you will need to type in nvm install 22.
The version number need not be specific (to include all of the major version, minor version, and patch number altogether).
After installing Node.js, you can view all the already installed versions of Node.js by typing in the following command (you can view an example output in the next tab).
      v24.16.0
default -> lts/* (-> v24.16.0)
iojs -> N/A (default)
unstable -> N/A (default)
node -> stable (-> v24.16.0) (default)
stable -> 24.16 (-> v24.16.0) (default)
lts/* -> lts/krypton (-> v24.16.0)
lts/argon -> v4.9.1 (-> N/A)
lts/boron -> v6.17.1 (-> N/A)
lts/carbon -> v8.17.0 (-> N/A)
lts/dubnium -> v10.24.1 (-> N/A)
lts/erbium -> v12.22.12 (-> N/A)
lts/fermium -> v14.21.3 (-> N/A)
lts/gallium -> v16.20.2 (-> N/A)
lts/hydrogen -> v18.20.8 (-> N/A)
lts/iron -> v20.20.2 (-> N/A)
lts/jod -> v22.22.3 (-> N/A)
lts/krypton -> v24.16.0
As of writing this guide, the latest LTS version of Node.js is v24.16.0. The following command can help with showing what version of Node.js is currently being used.
To change the version of Node.js being used, type in the following command:
Again, how specific the Node.js version number doesn't really matter.. at least I don't think it'll matter unless you have multiple versions installed with the same major version, but that might be very unlikely since a new major version is typically warranted only when there's a significant change involved.
Alternative: Herd
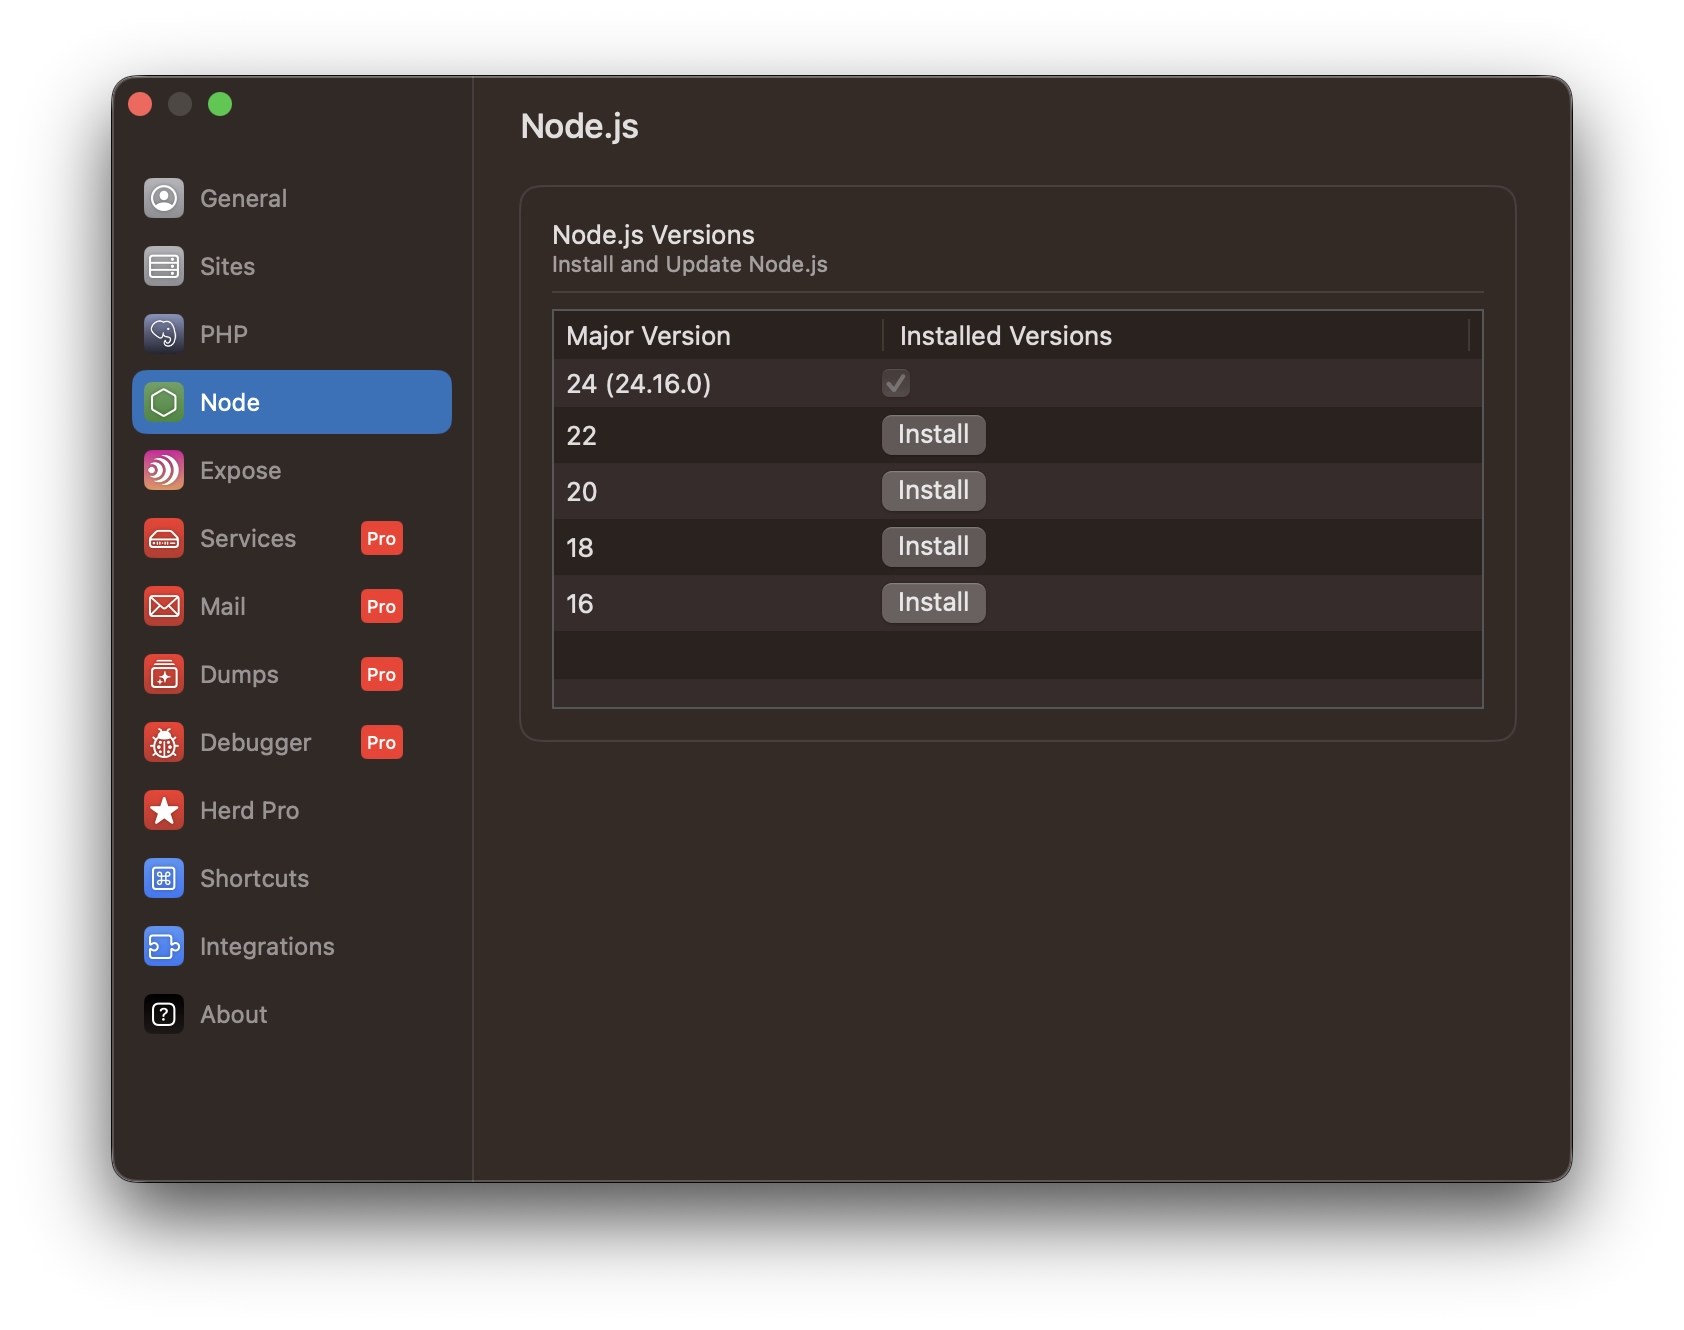
I believe Herd also provides an avenue to install Node.js aside from PHP. This part of the guide will detail how to install and manage Node.js using Herd. If you have not yet installed Herd yet, you can check out the guide on how to do so here.
Upon installing Herd, it should now run automatically each time you start up your machine (unless you configure it otherwise). Select Node on the menu at the left-hand side. You can select the Node version(s) you require.
Check Node.js version
You can check the active Node.js version independently from whether or not you used NVM by using the following command: